Windows Azure and Cloud Computing Posts for 11/4/2013+
Top Stories This Week:
- Scott Guthrie (@scottgu) reported Windows Azure: Import/Export Hard Drives, VM ACLs, Web Sockets, Remote Debugging, Continuous Delivery, New Relic, Billing Alerts and More in an 11/4/2013 post in the Windows Azure Infrastructure and DevOps section.
- The Windows Azure Team (@WindowsAzure) announced a Scheduler Preview on 11/4/2013 in the Windows Azure Cloud Services, Caching, APIs, Tools and Test Harnesses section.
- Ashish Goyal described One Thing You Must Do When: Service Endpoint is showing Offline in Azure Traffic Manager in a 10/8/2013 post to the Windows Azure Cloud Integration Engineering Team blog in the Windows Azure Service Bus, Traffic Manager, BizTalk Services and Workflow section below.
| A compendium of Windows Azure, Service Bus, BizTalk Services, Access Control, Caching, SQL Azure Database, and other cloud-computing articles. |
• Updated 11/10/2013 with new articles marked •.
Note: This post is updated weekly or more frequently, depending on the availability of new articles in the following sections:
- Windows Azure Blob, Drive, Table, Queue, HDInsight and Media Services
- Windows Azure SQL Database, Federations and Reporting, Mobile Services
- Windows Azure Marketplace DataMarket, Power BI, Big Data and OData
- Windows Azure Service Bus, Traffic Manager, BizTalk Services and Workflow
- Windows Azure Access Control, Active Directory, and Identity
- Windows Azure Virtual Machines, Virtual Networks, Web Sites, Connect, RDP and CDN
- Windows Azure Cloud Services, Caching, APIs, Tools and Test Harnesses
- Windows Azure Infrastructure and DevOps
- Windows Azure Pack, Hosting, Hyper-V and Private/Hybrid Clouds
- Visual Studio LightSwitch and Entity Framework v4+
- Cloud Security, Compliance and Governance
- Cloud Computing Events
- Other Cloud Computing Platforms and Services
Windows Azure Blob, Drive, Table, Queue, HDInsight and Media Services
<Return to section navigation list>
• Aung Oo, Jai Haridas and Brad Calder provided details in their Announcing Windows Azure Import/Export Service Preview post of 10/31/2013 to the Windows Azure Storage blog:
Windows Azure Storage team is excited to announce the preview of Windows Azure Import/Export service which provides an efficient solution for importing large amounts of on- premise data into Windows Azure Blobs or exporting your Windows Azure Blobs to you!
In this blog post, we will walk you through information regarding high level capabilities, how to enroll, getting started and when to use this service.
What is Windows Azure Import/Export service?
As described in our Getting Started Guide, Windows Azure Import/Export enables moving large amounts of data in and out of Windows Azure Blobs into your Windows Azure Storage account. You can ship TBs of encrypted data via hard disk drives through FedEx to our data centers where Microsoft’s high-speed internal network is used to transfer the data to or from your blob storage account.
The following requirements need to be followed:
- The devices need to be up to 4TB 3.5 inch SATA II internal hard drives. Note, it easy to attach an off the shelf SATA II drive to most any machine using a USB connector allowing you to easily transfer data to/from your machine to the SATA II drive. See an example of connectors in the table below.
- Drives shipped are required to be encrypted using BitLocker key.
To make drive preparation easy, we have provided a tool called WAImportExport.exe. More information on how to use the tool can be found here. Once the drives are prepared, you can login into Windows Azure Management Portal to
- Create Import/Export jobs
- Obtain the shipping address to the data center for where to ship the disks to
- Update the job with tracking numbers once the drives are shipped using FedEx to the location provided in step (2) above
- Manage the import/export jobs and monitor progress
The following MSDN article talks in depth about the steps involved and also answers some of the frequently asked questions. In addition to the management portal, you can also use the REST interface to create or manage your import/export jobs.

Table 1 Quick requirement overview

When to use Windows Azure Import/Export Service?
If you have TB’s of data, Windows Azure Import/Export can move data in and out of Windows Azure blobs much faster than uploading and downloading data over the Internet.
The factors that come into play when choosing are to use the import/export service versus transferring the data over the internet are:
- How much data needs to be imported/exported?
- What is network bandwidth to the region I want to copy data into or from?
- What is cost of bandwidth?
- Does the preview support my region?
Large data sets take very long time to upload or download over the internet. 10 TB could take years over T1 (1.5Mbps) or a month over T3 (44.7 Mbps). Customers can ship the drive using Windows Azure Import/Export service and significantly cut down the data upload or download time. The Windows Azure Import/Export service would take only a handful of days in addition to shipping time to transfer the data versus weeks/months/years for transferring the data over the internet.
Customers can calculate the time it would take to transfer their data over the internet. If it is more than a handful of days and the import/export service is available for their region, then they should consider using Windows Azure Import/Export service. However, for customers already having good peering or for smaller amounts of data, Windows Azure Copy tool could instead be used to efficiently import/export data from/to on premise.
Regions Supported
The Import/Export service can only accept shipments that originate from U.S. locations during preview release, and can return packages only to U.S. addresses. The service supports importing data to and exporting data from storage accounts in the following regions:
- East US
- West US
- North Central US
- South Central US
- North Europe
- West Europe
- East Asia
- Southeast Asia
Note, the import/export service currently runs in only a few of the U.S. regions for preview. This means you may need to ship your drives to a different region from where you storage account resides. If the storage account is different from the region to which you have to ship the drives you will see “The selected datacenter region and storage account region are not the same” in the portal when creating the job.
If your storage account resides in a European or Asian data center, you must ship your drive to one of the supported regions in the U.S., and the shipment must originate from within the U.S. The Import/Export service will then copy the data to or from your storage account in Europe or Asia.
Pricing
The Windows Azure Import/Export service will charge a drive handling fees of $80 per drive, and during the preview the drive handling fee will be at a discounted rate of $40 per drive. Regular storage transactions will apply for putting (import) and getting (export) the blobs from your storage account.
For import jobs, there is no ingress charge for the copy operation.
For export jobs, there will be data transfers fees for copying data between Windows Azure regions. For example, if your storage account resides in West Europe and you ship your drive to the East US data center, you will incur egress charges for moving the data from West Europe to East US in order to export it. In contrast, if your storage account resides in West US and you are told to ship your disks to West US then there are no egress charges for your export job.
More details on pricing can be found here.
How to enroll in the preview release?
This preview release is available only to users with a token. If you are interested in using this service, please send an email to waimportexport@microsoft.com with the following information:
- Regions you are interested in importing or exporting data to or from respectively
- Amount of data you would like to import or export
- The storage account name you want to import or export data to.
We will review the information before approving your request to allow you to use the service.
Summary
We are continuously making improvements to make this service better and very much value your feedback. Please feel free to leave comments and questions below or send an email to waimportexport@microsoft.com.
Please make sure to review legal supplemental terms of use for Windows Azure Import/Export Service prior to using this service.
• Allan Yiin (@AllanYiin) reported the November 2013 update to Microsoft Excel Power Query Preview supports Windows Azure Tables:

![]() It also supports Windows Azure Blobs, HDInsight and Marketplace data.
It also supports Windows Azure Blobs, HDInsight and Marketplace data.
You can download the latest version here:
Microsoft Power Query Preview for Excel, part of Power BI for Office 365 is a new add-in that provides a seamless experience for data discovery, data transformation and enrichment for Information Workers, BI professionals and other Excel users. This preview provides an early look into upcoming features that enable users to easily discover, combine, refine data for better analysis in Excel and collaboration with others in their organization. As with most previews, these features may appear differently in the final product.
With Power Query you can:

 Identify the data you care about from the sources you work with (e.g. relational databases, Excel, text and XML files, OData feeds, web pages, Hadoop HDFS, etc.).
 - Discover relevant data from inside(*) and outside your organization using the search capabilities within Excel.
- Combine data from multiple, disparate data sources and shape it in order to prepare the data for further analysis in tools like Excel and Power Pivot, or visualization in tools like Power View and Power Map.
- Share the queries that you created with others within your organization, so they can be easily found via Search. (*)

(*) This capability requires an active Power BI tenant in Office 365. You can sign up at www.office.com/powerbi

<Return to section navigation list>
Windows Azure SQL Database, Federations and Reporting, Mobile Services
![]() No significant articles so far this week.
No significant articles so far this week.

<Return to section navigation list>
Windows Azure Marketplace DataMarket, Cloud Numerics, Big Data and OData
No significant articles so far this week.
<Return to section navigation list>
Windows Azure Service Bus, Traffic Manager, BizTalk Services and Workflow
• Ashish Goyal described One Thing You Must Do When: Service Endpoint is showing Offline in Azure Traffic Manager in a 10/8/2013 post to the Windows Azure Cloud Integration Engineering Team blog:
Recently I came across multiple scenarios where the Service endpoints were showing Offline/Degraded in Traffic Manager. Those endpoints were valid, accessible and respective service was running fine, but still the end point was showing offline in Traffic Manager.
In the above screenshot, the respective endpoint is accessible fine, but the Traffic Manager is showing it as Degraded.
Interestingly, in all those scenarios, the reason was common. The endpoint in questions was returning a non http 200 response code (302/307 etc.).
The way Traffic Manager works is, it expects an Http 200 response from the endpoints you have configured, that too within 10 seconds. If this doesn’t happen, then monitoring system will either retries (in case of no response in 10 seconds) or assumes that the endpoint is not available.
From MSDN:
Traffic Manager only considers an endpoint to be Online if the return message is a 200 OK. If a non-200 response is received, it will assume the endpoint is not available and will count this as a failed check
The monitoring system performs a GET, but does not receive a response in 10 seconds or less. It then performs three more tries at 30 second intervals. This means that at most, it takes approximately 1.5 minutes for the monitoring system to detect when a service becomes unavailable. If one of the tries is successful, then the number of tries is reset. Although not shown in the diagram, if the 200 OK response(s) come back greater than 10 seconds after the GET, the monitoring system will still count this as a failed check.
In the above example, there was a redirection rule configured on the website which was returning http 302. And this the endpoint was showing Degraded. After removing the redirection, the Endpoint became Online again.
Though this looks like very obvious concept, but on a bad day, this could turn out to be really tricky (from past experiences).
Common Scenarios where you may run into this:
- Any sort of Redirection Rule on the Endpoint (Default Page, SSL Redirection etc.)
- Any custom Authentication mechanism or URL Rewrite rule which doesn’t return http 200 for the first request
- Home page takes >10 seconds to load
Further references:


The Windows Azure Cloud Integration Engineering Team blog is new to me. The first post was on 7/22/2013. Most articles appear to relate to troubleshooting.
![]() The Windows Azure Team (@WindowsAzure) announced a Scheduler Preview for posting messages to Windows Azure Service Bus Queues on 11/4/2013 in the Windows Azure Cloud Services, Caching, APIs, Tools and Test Harnesses section below.
The Windows Azure Team (@WindowsAzure) announced a Scheduler Preview for posting messages to Windows Azure Service Bus Queues on 11/4/2013 in the Windows Azure Cloud Services, Caching, APIs, Tools and Test Harnesses section below.

<Return to section navigation list>
Windows Azure Access Control, Active Directory, Identity and Workflow
Vittorio Bertocci (@vibronet) explained how to Call a Web API Without Knowing in Advance Its Resource URI or What Authority It Trusts
Courtesy of the daylight saving switch, which made the weekend just a tad longer, here there’s a quick post to show a relatively small but powerful feature of ADAL, the AuthenticationParameters class.
In a nutshell: I’ll show you how you can write a client to consume a Web API secured by AD – knowing nothing at development time about the Web API’s security requirement.
Resource-Driven Authority Discovery
Most of the ADAL code samples you have seen here follow the same (hopefully easy) pattern:
- Create an AuthenticationContext instance to represent in your code the authority (Windows Azure AD tenant/ADFS instance) trusted by your target resource
- Use the AuthenticationContext instance to obtain a token (via any of the AcquireToken overloads) for the target resource
- Use the token to call the service
That pattern assumes that you already know #1 the authority you want to work with, and 2# the identifier by which the target resource is known by that authority. That is often a sound assumption (after all, as of today you do have to explicitly configure permissions between a client and a resource, at least in AAD) but it does not always hold. You might have created a generic client, meant to be downloaded from some central store and used by multiple tenants that are unknown at development and publication time.
Sometimes, all you know are the coordinates of your client app itself (id, returnURI) and the physical URL (not the URI) of the resource you want to access.
Well, good news everyone! The Bearer Token Usage P.S. from the Oauth2.0 Authorization Framework defines a mechanism through which a protected resource can – upon receiving a request without adequate authentication credentials – challenge the caller by passing back information that the client could use to obtain the necessary credentials. Trivializing things a bit: you could say that if you call a Web API without including the token it expects, the Web API will reply back with the necessary data (usually the authority it trusts and the Web API’s identifier) for you to obtain the right token and retry. This handily takes care of the aforementioned case: who cares if you don’t know the authority and the id of the Web API in advance, when the Web API itself can tell you the first time you call it!
The challenge format is super simple and you could easily parse it manually, however we decided to make things absolutely frictionless for you and baked support for it directly in the library’s object model.
The responsibility of generating the challenge is on the resource developer: that means that if besides the client app you also own writing the Web API, it’s up to you to inject the necessary logic.
The main ADAL sample on code gallery does demonstrate this approach. However we wrote that sample in the pre-OWIN era, when you had to handle all the resource side code (JWT interception, validation, ClaimsPrincipal creation, etc) by hand. I wanted to make sure you know how to take advantage of this feature also when you are creating your Web API with the VS2013 templates (AAD tutorial here, ADFS tutorial here) and OWIN middleware. As of today that entails customizations that might not immediately clear, or at least weren’t for me: luckily I had the help of David Matson, a developer on the ASP.NET team that knows this stuff inside out and also happens to be the fastest typist I’ve ever seen working in the VS IDE. Thanks David!
Here there’s how I am going to break this down: first I’ll walk you though the code you need to add to the Web API project to generate the challenge, then I’ll show you what parts of ADAL you can use on the client to make sure your app understands the challenge. That done, we’ll give it a spin and then we’ll make some larger scope considerations.
Emitting a Challenge From Your Web API
Let’s start by creating a Web API project configured to work with organizational accounts, as described here.
That will provide us with the perfect starting point, a Web API project already provisioned in Windows Azure AD and already configured with the necessary OWIN middleware to validate JWTs from the Windows Azure AD tenant we used for creating the project.
The goal is to modify the behavior of the authentication OWIN middleware to produce a suitable Challenge message whenever a 401 response is warranted.
To do that, we will need to play a bit with the lower level components that ASP.NET uses for working with OWIN in Web API projects. Go to the Solution Explorer, right click on the Web API project and choose Manage NuGet Packages. Search for Microsoft.AspNet.WebApi.Owin and once you find it install it.
Excellent. That done, go to the Controllers folder and open the ValuesController.cs. We are going to use the default code generated by the template. Take a look at the controller declaration:
[Authorize]
public class ValuesController : ApiController
{
    // GET api/values
    public IEnumerable<string> Get()
    {
        return new string[] { "value1", "value2" };
    }
The template decorates the controller with [Authorize] to enforce that the caller will be granted access only upon presentation of the correct credentials – in this case, a JWT from the right AAD tenant.
Now, the Owin middleware already has its own challenge generation logic – but it does not generate the kind of message we want. David tells me that as of today the strategy that yields the best code economy consists in
- creating a filter that will turn off the default challenge behavior
- creating a filter that will pick up that functionality and produce the message we want
In practice, this means that the code above will change to look like the following:
[HostAuthenticationNoChallenge("Bearer")]
[WindowsAzureADChallenge]
[Authorize]
public class ValuesController : ApiController
{
    // GET api/values
    public IEnumerable<string> Get()
    {
        return new string[] { "value1", "value2" };
    }
The first attribute does #1, the second one does #2. Let’s define those classes, starting with HostAuthenticationNoChallenge. Here there’s the code:
public class HostAuthenticationNoChallengeAttribute : Attribute, IAuthenticationFilter
{
    private readonly IAuthenticationFilter _inner;

    public HostAuthenticationNoChallengeAttribute(string authenticationType)
    {
        _inner = new HostAuthenticationAttribute(authenticationType);
    }

    public Task AuthenticateAsync(HttpAuthenticationContext context,
CancellationToken cancellationToken) { return _inner.AuthenticateAsync(context, cancellationToken); } public Task ChallengeAsync(HttpAuthenticationChallengeContext context,CancellationToken cancellationToken) { return Task.FromResult(0); } public bool AllowMultiple { get { return _inner.AllowMultiple; } } }That does not have a lot going identity-wise, hence I am mostly using this as boilerplate logic for enabling the next class to do its job:
public class WindowsAzureADChallengeAttribute : Attribute, IAuthenticationFilter
{
    public Task AuthenticateAsync(HttpAuthenticationContext context,
CancellationToken cancellationToken) { return Task.FromResult(0); } public Task ChallengeAsync(HttpAuthenticationChallengeContext context,CancellationToken cancellationToken) { context.Result = new AADChallengeResult { Inner = context.Result }; return Task.FromResult(0); } public bool AllowMultiple { get { return true; } } private class AADChallengeResult : IHttpActionResult { public IHttpActionResult Inner { get; set; } public async Task<HttpResponseMessage> ExecuteAsync(CancellationToken cancellationToken) { HttpResponseMessage response = await Inner.ExecuteAsync(cancellationToken); if (response.StatusCode == HttpStatusCode.Unauthorized) { string challengeMessage = string.Format("authorization_uri=\"https://login.windows.net/{0}\",resource_id={1}", ConfigurationManager.AppSettings["ida:Tenant"], ConfigurationManager.AppSettings["ida:Audience"]); AuthenticationHeaderValue authenticateHeader =new AuthenticationHeaderValue("Bearer", challengeMessage); response.Headers.WwwAuthenticate.Add(authenticateHeader); } return response; } } }As you can imagine, the core of the challenge generation logic takes place in AADChallengeResult and specifically in ExecuteAsync. In summary: if the response is carrying a 401, the code inserts in the www-authenticate header a “Bearer” followed by a comma separated values list containing authorization_uri (the authority the Web API wants you to use when requesting a token for it) and resource_id (the ID you should sue with that authority when requesting a token for this Web API).
Both values come straight from the AppSettings entries populated by the template at project creation time. That means that the code you see here is 100% boilerplate: you can paste it in ANY Web API project generated with VS2013 with organizational account authentication, and as long as you didn’t change anything fundamental it will work right away as is with no changes need.
Using AuthenticationParameters in the Client’s Code
Moving back to the client. You can use any .NET client type you like; here I’m using a WinForm app given that it’s super fast. Follow the instructions in the section “Register a Native Client” in this article to let WIndows Azure AD know about your client and enable the necessary permissions for the client to call your Web API. That done, add the following code in the click handler of a button:
1: private async void button1_Click(object sender, EventArgs e)2: {3: string webApiUrl = "https://localhost:44305/api/Values";4: string clientID = "220c8fe6-5f65-405f-bff3-089e88a2b9d4";5: string returnUri = "http://challengedclient";6:7: AuthenticationParameters ap =8: AuthenticationParameters.CreateFromResourceUrl(new Uri(webApiUrl));9: AuthenticationContext ac =10: new AuthenticationContext(ap.Authority);11: AuthenticationResult ar =12: ac.AcquireToken(ap.Resource,13: clientID,14: new Uri(returnUri));15:16: HttpClient client = new HttpClient();17: HttpRequestMessage request =18: new HttpRequestMessage(HttpMethod.Get, webApiUrl);19: request.Headers.TryAddWithoutValidation("Authorization",20: ar.CreateAuthorizationHeader());21: HttpResponseMessage response =22: await client.SendAsync(request);23: string responseString =24: await response.Content.ReadAsStringAsync();25:26: MessageBox.Show(responseString);27: }Now, this is the part I want to drill in a bit.
Lines 3, 4 and 5 hold the initial values we know of from the client’s perspective: the client coordinates, which will remain the same (usually) no matter which resource we’ll access, and the physical, network-addressable endpoint at which the target resource resides.
Lines 7 is where the magic happens. The class AuthenticationParameters is especially designed to help you to take advantage of resources that can emit challenges: it contains logic for eliciting a challenge and make the results easily accessible to you. What is demonstrated here is the case in which you know for sure that the resource supports challenges and you want to take advantage of that upfront: however this is not the only way to use it, as we’ll see later.What is demonstrated here is the case in which you know for sure that the resource supports challenges and you want to take advantage of that upfront: however this is not the only way to use it, as we’ll see later.

The static method CreateFromResourceUrl simply GETs the resource at the URL provided, and wraps the salient elements of the challenge in the properties of a new AuthenticationParameters instance.Line 9 demonstrates how to use the information received from the challenge to create your AuthenticationContext against the AAD tenant requested by the resource.
Line 11 shows how to use the resource ID obtained form the challenge to acquire a token correctly scoped.
The rest of the code is just the usual call to a default Web API, which you have seen a million times by now.
IMPORTANT: using the challenge information to drive authentication entails a certain amount of risk. For what concerns authenticating the user this is somewhat mitigated by the authority validation in the AAD case, though it remains a risk for the ADFS case (where the automatic validation feature is not available and AuthenticationContext calls must turn that off). You should ensure you perform whatever checks make sense in your scenario before blindly trusting what you receive in the challenge.
Special consideration should be given to the risk of token forwarding attacks. Imagine that a malicious resource A wants to gain access to resource B. If you use the challenge mechanism for calling A, A might send you a challenge containing the resource ID for B. If you’d just blindly follow what A says, you’d obtain a token scoped for B and present it in your call for A. At that point, A could use that token for calling B and pretending to be you. NOT good.
How do you defend yourself from this? Mostly by enforcing constraints on the shape of the resource IDs received. For example, you might want to impose that the URI of the resource returned in the challenge uses the same domain/hostname of the physical address at which the resource is listening from. That is not always applicable, especially at development time or if you didn’t register a vanity domain; but it’s a good example of what you might want to do to prevent issues.
And of course, all the basic networking hygiene applies here: do this only on HTTPS, ensure that the SSL channels are correctly validated to prevent DNS attacks, and so on.
The Solution in Action
Let’s give the solution a spin! Start both the Web API and the client project, put a breakpoint on line 9 on the client and hit the button.
The challenge generation logic worked, and AuthenticationParameters contains the right values. If you hit F5 you’ll see that the call performed according to those parameters succeeds. Q.E.D.
Want More?
This is a very basic use of the feature. As you have seen in the class diagram excerpt above, AuthenticationParameters offers other methods for populating its properties. Those are meant for more reactive scenarios, in which you receive a 401 during an actual call to the Web API and the response contains a challenge. The two overloads are meant to offer you the convenience of working at whatever level (header or entire response) you are confortable with, or what is dictated by the error management in the client library you are using if the resource you are targeting offers one.
You’d want to modify that logic for Web API working against ADFS (you would not hardcode login.windows net in the authority_uri). The warnings I gave earlier are especially serious when working with an on-premises instance, hence I recommend you do as much due diligence as possible before enabling the feature.
The static logic shown here would not work in case of multi-tenant resources: in that case you’d likely add some route-based logic in your filters to customize the challenge to the AAD tenant meant to secure a given Web API route (which might contains hints of the tenant it is meant for). Remember: for URLs that carry no indication of who the intended tenant might be, there’s always the option using the Common endpoint.
Finally: the use of this feature might at times lead to some odd behaviors if the Web API does not do its job properly. Say that the challenge generation logic is buggy and the requirements sent back in the challenge are not the same requirements enforced at request time: if your client is using the challenge to react to access errors, it might end up in a poisoned loop in which it obtains a token which complies to the Web API challenge – but that it fails when used, generating the same challenge and going back to square 1. There’s no automated logic in ADAL to help you detecting this situation, given that ADAL stays out of your way when you are actually accessing the resource, hence to prevent similar situations you’ll have to make the necessary checks in your own code.
That said, I don’t want the above to scare you! Like everything concerning security this feature requires due diligence, but once that’s done you get clients that can be self-configuring without the need of out of band settings acquisition logic. I believe this will be super important, especially once this capability will be available for the ADAL flavors targeting applications stores.


<Return to section navigation list>
Windows Azure Virtual Machines, Virtual Networks, Web Sites, Connect, RDP and CDN
Jeffrey Schwartz (@JeffreySchwartz) asserted SharePoint Shops Eying Windows Azure as Office 365 Alternative in an 11/4/2013 post to his Schwarz Report column for Redmond magazine:
A vast majority of Redmond magazine readers are holding off on moving their SharePoint infrastructures to the cloud and the small portion that are typically opt for Office 365. However a growing number of those planning on running SharePoint in the cloud are looking at Windows Azure at the expense of Office 365.
To be sure, even the majority of those planning to move to SharePoint in the cloud are leaning toward Office 365. But an online survey of nearly 500 readers last week showed a surprising and interesting trend: While 66 percent of current SharePoint online users have Office 365 subscriptions (compared with 14 percent using Windows Azure and 15 percent using other cloud providers), of those planning to run SharePoint in the cloud in the future, 55 percent will opt for Office 365 and nearly 29 percent will use Windows Azure.
That points to a segment of SharePoint shops that are turned off by the lack of code portability from older versions of SharePoint. By standing up their own SharePoint servers in Windows Azure, they get the benefit of running their custom or shrink-wrapped apps in the cloud.
"People don't do customization of SharePoint Online using the old method because the product limits what they can do," explained Forrester analyst John Rymer, who, along with colleague Rob Koplowitz, released a study late last month of their own enterprise customer reluctance to move SharePoint to the cloud. "Integration, for example, is pretty limited, and Microsoft will not accept 'just any random code' and the rules indistinct."
Most SharePoint experts I talk to agree with this but whether or not Office 365 is a real deal-breaker depends on the customer's application and overall requirements. "If you want to use all of the content management capabilities, deeper integration into other line of business systems, those are the kinds of customers that will continue to run SharePoint either in their own servers or Windows Azure," said Adriaan Van Wyk, CEO of K2, a provider of a SharePoint workflow app for Office 365 that uses Windows Azure.
When I shared the data with Forrester's Koplowitz, he was intrigued by the number of respondents who are looking to run SharePoint in Windows Azure. "That's a real interesting data point," he said.
For now, only 15 percent of respondents to Forrester's August survey said they were using Office 365 SharePoint Online, up just 3 percent over last year, prior to the release of the enhanced service. That's relatively consistent with our survey, which shows just 17 percent of our readers are running SharePoint in any cloud service. …


Read the entire column.
Full disclosure: I’m a contributing editor for Visual Studio Magazine, a sister publication of 1105 Media.

<Return to section navigation list>
Windows Azure Cloud Services, Caching, APIs, Tools and Test Harnesses
• Gregory Leake described Migrating a Java Spring Framework Application to Windows Azure in a 10/6/2013 post to the Windows Azure blog:
We have just published a new tutorial and sample code to illustrate many of the Windows Azure Java-related technologies in action. In this guide, we provide a step-by-step tutorial that shows how to migrate a Java Spring Framework application (the PetClinic sample application) to the Windows Azure Cloud. The code that accompanies this document is also published on GitHub. We encourage Java developers to download and explore this new sample and tutorial.
Details
Windows Azure is an open cloud platform, and supports a wide variety of programming languages and frameworks, including Microsoft .NET, Java, Node.js, PHP, Python and Ruby. This guide is written specifically for Java developers to demonstrate how to migrate a typical Java application to the Windows Azure cloud. While the tutorial focuses on a popular Spring Framework sample application (the Java PetClinic); the tutorial will introduce you to the Azure Java SDK for Eclipse, Windows Azure Caching using memcached, Windows Azure Cloud Services, Windows Azure SQL Database, as well as a variety of other technologies that would be used in many other types of Java applications.
Windows Azure Cloud Services (PaaS) or Windows Azure Virtual Machines (IaaS)?
Fundamentally, there are two different ways to run an application layer, such as a Web site, on Windows Azure. The first is via Platform as a Service (PaaS) via Azure Cloud Services. The second is via Infrastructure as a Service (IaaS) via Windows Azure Virtual Machines (VMs). With either, the developer chooses from one of several worldwide data centers (four in the U.S., two in Europe, and two in Asia) to host their application.
- With Windows Azure Cloud Services, the developer just focuses on the application, and the platform automatically provisions and maintains the instances (under the covers these are Windows YHyperHY Hyper-V VMs) upon which the application layer runs. The instances can be horizontally scaled from one to several hundred clones, and load balancing is automatic. While the instances can be sized (with different numbers of virtual cores and memory), the instances are fundamentally managed by Windows Azure, including all patching and security updates of the OS layer. This guide focuses on running the Java Pet Clinic sample application on Windows Azure Cloud Services.
- With Windows Azure Virtual Machines, the developer creates his/her own VM image, and is responsible for installing and managing that VM including any software to be installed on the VM. For Java developers, there are a variety of pre-built VM images available, including Windows and several distributions of Linux. This is also a great way to run Java applications in the Windows Azure Cloud; as the developer has low-level control of the OS and VM, and can install other software such as mySQL directly on any number of VMs, to build-out a complete application from application layer to data layer. Most Java applications will simply migrate with little or no code changes required. Load balancing can also be setup such that multiple VMs (perhaps running Tomcat/JSP layer) are load balanced via round-robin. Unlike Azure Cloud Services, however, the developer must manage the VM including any security patching just as if the VM was running on-premises. While the new tutorial focuses on Java running on Windows Azure Cloud Services, we encourage developers to also try out Windows Azure Virtual Machines, using either Windows or Linux VMs.
Spring Framework on the Windows Azure Platform
Spring Framework’s recently updated PetClinic sample was chosen for this new guide because it is a familiar vehicle for demonstrating several enterprise technologies that are used to create scalable Java EE applications such as Spring Data JPA, MVC, AOP, JMX, EhCache, and Logback. We will be extending PetClinic by injecting transient fault handling and Memcached on Azure Cache via AOP.
For Java developers who are familiar with Eclipse and STS, Microsoft has provided the ‘Windows Azure Toolkit for Eclipse with Java’. This toolkit provides the following resources for aiding in Java development in Eclipse on Windows Azure:
- Windows Azure Plugin for Eclipse with Java
- Microsoft JDBC 4.0 Driver for SQL Server and Windows Azure SQL Database
- Package for Apache Qpid Client Libraries for JMS
- Package for Windows Azure Libraries for Java
- Windows Azure Access Control Services Filter
- Windows Azure Common Plugin
In this guide, we will be using the Windows Azure Plugin for Eclipse with Java and the Microsoft JDBC 4.0 Driver for SQL Server. The plugin to Eclipse provides Java wrappers for Windows Azure services and a Windows Azure emulator.
Conclusion
Windows Azure is an open cloud platform, and supports a wide variety of programming languages and frameworks. We encourage Java developers to explore new Java on Windows Azure tutorial and sample code to illustrate many of the Windows Azure Java-related technologies in action
• Jack Clark quoted Microsoft’s Mike Neil saying "Machines will fail, software has bugs, people will make mistakes" in his The TRUTH behind Microsoft Azure's global cloud mega-cock-up article of 11/8/2013 for the Register UK:
Windows Azure suffered a global meltdown at the end of October that caused us to question whether Microsoft had effectively partitioned off bits of the cloud from one another. Now we have some answers.
After a bit of prodding, Redmond sat us down with Windows Azure general manager Mike Neil, who explained to us why a sub-component of the system failed worldwide last week.
"There are three truths of cloud – machines will fail, software has bugs, people will make mistakes," he said.
The trick is to build your cloud system so that end users never notice these faults, but when everyone experiences a worldwide wobble in your service, it's hard to claim, as Microsoft does, that "Windows Azure provides on-demand infrastructure that scales."
The problem that befell Azure lay the "Red Dog front end" (RDFE), which provides the publicly exposed management portal and the service management API. Users' requests are fed through the RDFE to the fabric front end, which disperses requests through aggregators and load balancers to fabric controllers that direct the cloud's virtual machines and other resources.
Microsoft made a change to the RDFE which it tested on a small percent of nodes within a single cluster. Upon seeing no problems, the company pushed it out worldwide.
"We were seeing good results and then we rolled it out more broadly," Neil said. When the update went global, the company detected "a small number of customers having issues with swap."
The swap feature lets admins move virtual machines from staging to production. It's a minor service, but some customers were affected (and one that El Reg spoke to was a bit miffed by the impact).
The key problem was that this fault, however "intermittent", occurred in all of Microsoft's regions, thus causing disruption across the world, because RDFE turned into a single point of failure in Azure – all thanks to the problematic update.
"One of the most difficult problems for us to address which creates a single point of failure in the system is the software itself," Neil said.
Though Microsoft eventually fixed the service by tweaking the RDFE, the company drew significant flack for having a planet-wide fault. Due to the way Azure is built, there can only be one RDFE functioning worldwide at any one time, rather than multiple versions in an A/B testing arrangement as other major clouds like Amazon and Google are thought to use.
"The challenge we have for RDFE is that it's the API everybody talks to," he says. "In this particular case, we need to present a common API to the rest of the world. RDFE is that one special case."
We here at El Reg's floating cloud bureau understand Microsoft issued a full report on the outage to affected customers today. If it happened to plop into your inbox, do get in touch. ®
I didn’t experience this problem with my demo Windows Azure Web sites and Web role, but haven’t received received the promised report.
See the Windows Azure Pack, Hosting, Hyper-V and Private/Hybrid Clouds section below for another quote from Mike Neil.
The Windows Azure Team (@WindowsAzure) announced a Scheduler Preview on 11/4/2013:
Run jobs on simple or complex recurring schedules
Windows Azure Scheduler allows you to invoke actions—such as calling HTTP/S endpoints or posting a message to a storage queue—on any schedule. With Scheduler, you create jobs in the cloud that reliably call services both inside and outside of Windows Azure and run those jobs on demand, on a regularly recurring schedule, or designate them for a future date. This service is currently available as a standalone API.
Use Scheduler to:
Invoke a Web Service over HTTP/s
With Scheduler, you can invoke any web service endpoint once or on a recurring schedule over HTTP/s. Today, several internal services utilize Scheduler to enable a variety of scenarios, including:
- A globally available consumer SaaS app turns to the Scheduler to invoke a web service that performs data management on a set schedule
- Windows Azure Mobile Services powers its scheduled scripts feature with the Scheduler
- Another Windows Azure service uses the Scheduler to regularly invoke a web service that performs diagnostic log cleanup and data aggregation
Post a message to a Windows Azure Storage Queue
You can also use the Scheduler to post a message to a storage queue, enabling asynchronous processing of recurring requests without needing to stand up a web service. You unlock several additional scenarios when your job can simply ready from a queue, namely:
- Process long running requests - Http/s requests will timeout when a response is not received within a certain amount of time. For complex requests, such as a series of SQL queries against a large database, posting a message to storage queues allows you to complete the work without building additional asynchronous logic into your web service.
- Enable a service to be invoked when offline - Typically, a web service needs to be online at the time the Scheduler invokes the endpoint. With messages posted to storage queues, however, the service can be offline when the Scheduler sends the message and field the request when it later comes online.
Next Steps
View pricing details. Browse the documentation center for resources. Explore flexible purchase options:


Return to section navigation list>
Windows Azure Infrastructure and DevOps
Scott Guthrie (@scottgu) reported Windows Azure: Import/Export Hard Drives, VM ACLs, Web Sockets, Remote Debugging, Continuous Delivery, New Relic, Billing Alerts and More in an 11/4/2013 post:
Two weeks ago we released a giant set of improvements to Windows Azure, as well as a significant update of the Windows Azure SDK.
This morning we released another massive set of enhancements to Windows Azure. Today’s new capabilities include:
- Storage: Import/Export Hard Disk Drives to your Storage Accounts
- HDInsight: General Availability of our Hadoop Service in the cloud
- Virtual Machines: New VM Gallery, ACL support for VIPs
- Web Sites: WebSocket and Remote Debugging Support
- Notification Hubs: Segmented customer push notification support with tag expressions
- TFS & GIT: Continuous Delivery Support for Web Sites + Cloud Services
- Developer Analytics: New Relic support for Web Sites + Mobile Services
- Service Bus: Support for partitioned queues and topics
- Billing: New Billing Alert Service that sends emails notifications when your bill hits a threshold you define
All of these improvements are now available to use immediately (note that some features are still in preview). Below are more details about them.
Storage: Import/Export Hard Disk Drives to Windows Azure
I am excited to announce the preview of our new Windows Azure Import/Export Service!
The Windows Azure Import/Export Service enables you to move large amounts of on-premises data into and out of your Windows Azure Storage accounts. It does this by enabling you to securely ship hard disk drives directly to our Windows Azure data centers. Once we receive the drives we’ll automatically transfer the data to or from your Windows Azure Storage account. This enables you to import or export massive amounts of data more quickly and cost effectively (and not be constrained by available network bandwidth).
Encrypted Transport
Our Import/Export service provides built-in support for BitLocker disk encryption – which enables you to securely encrypt data on the hard drives before you send it, and not have to worry about it being compromised even if the disk is lost/stolen in transit (since the content on the transported hard drives is completely encrypted and you are the only one who has the key to it). The drive preparation tool we are shipping today makes setting up bitlocker encryption on these hard drives easy.
How to Import/Export your first Hard Drive of Data
You can read our Getting Started Guide to learn more about how to begin using the import/export service. You can create import and export jobs via the Windows Azure Management Portal as well as programmatically using our Server Management APIs.
It is really easy to create a new import or export job using the Windows Azure Management Portal. Simply navigate to a Windows Azure storage account, and then click the new Import/Export tab now available within it (note: if you don’t have this tab make sure to sign-up for the Import/Export preview):
Then click the “Create Import Job” or “Create Export Job” commands at the bottom of it. This will launch a wizard that easily walks you through the steps required:
For more comprehensive information about Import/Export, refer to Windows Azure Storage team blog. You can also send questions and comments to the waimportexport@microsoft.com email address.
We think you’ll find this new service makes it much easier to move data into and out of Windows Azure, and it will dramatically cut down the network bandwidth required when working on large data migration projects. We hope you like it.
HDInsight: 100% Compatible Hadoop Service in the Cloud
Last week we announced the general availability release of Windows Azure HDInsight. HDInsight is a 100% compatible Hadoop service that allows you to easily provision and manage Hadoop clusters for big data processing in Windows Azure. This release is now live in production, backed by an enterprise SLA, supported 24x7 by Microsoft Support, and is ready to use for production scenarios.
HDInsight allows you to use Apache Hadoop tools, such as Pig and Hive, to process large amounts of data in Windows Azure Blob Storage. Because data is stored in Windows Azure Blob Storage, you can choose to dynamically create Hadoop clusters only when you need them, and then shut them down when they are no longer required (since you pay only for the time the Hadoop cluster instances are running this provides a super cost effective way to use them).
You can create Hadoop clusters using either the Windows Azure Management Portal (see below) or using our PowerShell and Cross Platform Command line tools:
The import/export hard drive support that came out today is a perfect companion service to use with HDInsight – the combination allows you to easily ingest, process and optionally export a limitless amount of data. We’ve also integrated HDInsight with our Business Intelligence tools, so users can leverage familiar tools like Excel in order to analyze the output of jobs.
You can find out more about how to get started with HDInsight here.
Virtual Machines: VM Gallery Enhancements
Today’s update of Windows Azure brings with it a new Virtual Machine gallery that you can use to create new VMs in the cloud. You can launch the gallery by doing New->Compute->Virtual Machine->From Gallery within the Windows Azure Management Portal:
The new Virtual Machine Gallery includes some nice enhancements that make it even easier to use:
Search: You can now easily search and filter images using the search box in the top-right of the dialog. For example, simply type “SQL” and we’ll filter to show those images in the gallery that contain that substring.
Category Tree-view: Each month we add more built-in VM images to the gallery. You can continue to browse these using the “All” view within the VM Gallery – or now quickly filter them using the category tree-view on the left-hand side of the dialog. For example, by selecting “Oracle” in the tree-view you can now quickly filter to see the official Oracle supplied images.
MSDN and Supported checkboxes: With today’s update we are also introducing filters that makes it easy to filter out types of images that you may not be interested in. The first checkbox is MSDN: using this filter you can exclude any image that is not part of the Windows Azure benefits for MSDN subscribers (which have highly discounted pricing - you can learn more about the MSDN pricing here). The second checkbox is Supported: this filter will exclude any image that contains prerelease software, so you can feel confident that the software you choose to deploy is fully supported by Windows Azure and our partners.
Sort options: We sort gallery images by what we think customers are most interested in, but sometimes you might want to sort using different views. So we’re providing some additional sort options, like “Newest,” to customize the image list for what suits you best.
Pricing information: We now provide additional pricing information about images and options on how to cost effectively run them directly within the VM Gallery.
The above improvements make it even easier to use the VM Gallery and quickly create launch and run Virtual Machines in the cloud.
Virtual Machines: ACL Support for VIPs
A few months ago we exposed the ability to configure Access Control Lists (ACLs) for Virtual Machines using Windows PowerShell cmdlets and our Service Management API. With today’s release, you can now configure VM ACLs using the Windows Azure Management Portal as well. You can now do this by clicking the new Manage ACL command in the Endpoints tab of a virtual machine instance:
This will enable you to configure an ordered list of permit and deny rules to scope the traffic that can access your VM’s network endpoints. For example, if you were on a virtual network, you could limit RDP access to a Windows Azure virtual machine to only a few computers attached to your enterprise. Or if you weren’t on a virtual network you could alternatively limit traffic from public IPs that can access your workloads:
Here is the default behaviors for ACLs in Windows Azure:
- By default (i.e. no rules specified), all traffic is permitted.
- When using only Permit rules, all other traffic is denied.
- When using only Deny rules, all other traffic is permitted.
- When there is a combination of Permit and Deny rules, all other traffic is denied.
Lastly, remember that configuring endpoints does not automatically configure them within the VM if it also has firewall rules enabled at the OS level. So if you create an endpoint using the Windows Azure Management Portal, Windows PowerShell, or REST API, be sure to also configure your guest VM firewall appropriately as well.
Web Sites: Web Sockets Support
With today’s release you can now use Web Sockets with Windows Azure Web Sites. This feature enables you to easily integrate real-time communication scenarios within your web based applications, and is available at no extra charge (it even works with the free tier). Higher level programming libraries like SignalR and socket.io are also now supported with it.
You can enable Web Sockets support on a web site by navigating to the Configure tab of a Web Site, and by toggling Web Sockets support to “on”:
Once Web Sockets is enabled you can start to integrate some really cool scenarios into your web applications. Check out the new SignalR documentation hub on www.asp.net to learn more about some of the awesome scenarios you can do with it.
Web Sites: Remote Debugging Support
The Windows Azure SDK 2.2 we released two weeks ago introduced remote debugging support for Windows Azure Cloud Services. With today’s Windows Azure release we are extending this remote debugging support to also work with Windows Azure Web Sites.
With live, remote debugging support inside of Visual Studio, you are able to have more visibility than ever before into how your code is operating live in Windows Azure. It is now super easy to attach the debugger and quickly see what is going on with your application in the cloud.
Remote Debugging of a Windows Azure Web Site using VS 2013
Enabling the remote debugging of a Windows Azure Web Site using VS 2013 is really easy. Start by opening up your web application’s project within Visual Studio. Then navigate to the “Server Explorer” tab within Visual Studio, and click on the deployed web-site you want to debug that is running within Windows Azure using the Windows Azure->Web Sites node in the Server Explorer. Then right-click and choose the “Attach Debugger” option on it:
When you do this Visual Studio will remotely attach the debugger to the Web Site running within Windows Azure. The debugger will then stop the web site’s execution when it hits any break points that you have set within your web application’s project inside Visual Studio. For example, below I set a breakpoint on the “ViewBag.Message” assignment statement within the HomeController of the standard ASP.NET MVC project template. When I hit refresh on the “About” page of the web site within the browser, the breakpoint was triggered and I am now able to debug the app remotely using Visual Studio:
Note above how we can debug variables (including autos/watchlist/etc), as well as use the Immediate and Command Windows. In the debug session above I used the Immediate Window to explore some of the request object state, as well as to dynamically change the ViewBag.Message property. When we click the the “Continue” button (or press F5) the app will continue execution and the Web Site will render the content back to the browser. This makes it super easy to debug web apps remotely.
Tips for Better Debugging
To get the best experience while debugging, we recommend publishing your site using the Debug configuration within Visual Studio’s Web Publish dialog. This will ensure that debug symbol information is uploaded to the Web Site which will enable a richer debug experience within Visual Studio. You can find this option on the Web Publish dialog on the Settings tab:
When you ultimately deploy/run the application in production we recommend using the “Release” configuration setting – the release configuration is memory optimized and will provide the best production performance. To learn more about diagnosing and debugging Windows Azure Web Sites read our new Troubleshooting Windows Azure Web Sites in Visual Studio guide.
Notification Hubs: Segmented Push Notification support with tag expressions
In August we announced the General Availability of Windows Azure Notification Hubs - a powerful Mobile Push Notifications service that makes it easy to send high volume push notifications with low latency from any mobile app back-end. Notification hubs can be used with any mobile app back-end (including ones built using our Mobile Services capability) and can also be used with back-ends that run in the cloud as well as on-premises.
Beginning with the initial release, Notification Hubs allowed developers to send personalized push notifications to both individual users as well as groups of users by interest, by associating their devices with tags representing the logical target of the notification. For example, by registering all devices of customers interested in a favorite MLB team with a corresponding tag, it is possible to broadcast one message to millions of Boston Red Sox fans and another message to millions of St. Louis Cardinals fans with a single API call respectively.
New support for using tag expressions to enable advanced customer segmentation
With today’s release we are adding support for even more advanced customer targeting. You can now identify customers that you want to send push notifications to by defining rich tag expressions. With tag expressions, you can now not only broadcast notifications to Boston Red Sox fans, but take that segmenting a step farther and reach more granular segments. This opens up a variety of scenarios, for example:
- Offers based on multiple preferences—e.g. send a game day vegetarian special to users tagged as both a Boston Red Sox fan AND a vegetarian
- Push content to multiple segments in a single message—e.g. rain delay information only to users who are tagged as either a Boston Red Sox fan OR a St. Louis Cardinal fan
- Avoid presenting subsets of a segment with irrelevant content—e.g. season ticket availability reminder to users who are tagged as a Boston Red Sox fan but NOT also a season ticket holder
To illustrate with code, consider a restaurant chain app that sends an offer related to a Red Sox vs Cardinals game for users in Boston. Devices can be tagged by your app with location tags (e.g. “Loc:Boston”) and interest tags (e.g. “Follows:RedSox”, “Follows:Cardinals”), and then a notification can be sent by your back-end to “(Follows:RedSox || Follows:Cardinals) && Loc:Boston” in order to deliver an offer to all devices in Boston that follow either the RedSox or the Cardinals.
This can be done directly in your server backend send logic using the code below:
var notification = new WindowsNotification(messagePayload);
hub.SendNotificationAsync(notification, "(Follows:RedSox || Follows:Cardinals) && Loc:Boston");
In your expressions you can use all Boolean operators: AND (&&), OR (||), and NOT (!). Some other cool use cases for tag expressions that are now supported include:
- Social: To “all my group except me” - group:id && !user:id
- Events: Touchdown event is sent to everybody following either team or any of the players involved in the action: Followteam:A || Followteam:B || followplayer:1 || followplayer:2 …
- Hours: Send notifications at specific times. E.g. Tag devices with time zone and when it is 12pm in Seattle send to: GMT8 && follows:thaifood
- Versions and platforms: Send a reminder to people still using your first version for Android - version:1.0 && platform:Android
For help on getting started with Notification Hubs, visit the Notification Hub documentation center. Then download the latest NuGet package (or use the Notification Hubs REST APIs directly) to start sending push notifications using tag expressions. They are really powerful and enable a bunch of great new scenarios.
TFS & GIT: Continuous Delivery Support for Web Sites + Cloud Services
With today’s Windows Azure release we are making it really easy to enable continuous delivery support with Windows Azure and Team Foundation Services.
Team Foundation Services is a cloud based offering from Microsoft that provides integrated source control (with both TFS and Git support), build server, test execution, collaboration tools, and agile planning support. It makes it really easy to setup a team project (complete with automated builds and test runners) in the cloud, and it has really rich integration with Visual Studio.
With today’s Windows Azure release it is now really easy to enable continuous delivery support with both TFS and Git based repositories hosted using Team Foundation Services. This enables a workflow where when code is checked in, built successfully on an automated build server, and all tests pass on it – I can automatically have the app deployed on Windows Azure with zero manual intervention or work required.
The below screen-shots demonstrate how to quickly setup a continuous delivery workflow to Windows Azure with a Git-based ASP.NET MVC project hosted using Team Foundation Services.
Enabling Continuous Delivery to Windows Azure with Team Foundation Services
The project I’m going to enable continuous delivery with is a simple ASP.NET MVC project whose source code I’m hosting using Team Foundation Services. I did this by creating a “SimpleContinuousDeploymentTest” repository there using Git – and then used the new built-in Git tooling support within Visual Studio 2013 to push the source code to it. Below is a screen-shot of the Git repository hosted within Team Foundation Services:
I can access the repository within Visual Studio 2013 and easily make commits with it (as well as branch, merge and do other tasks). Using VS 2013 I can also setup automated builds to take place in the cloud using Team Foundation Services every time someone checks in code to the repository:
The cool thing about this is that I don’t have to buy or rent my own build server – Team Foundation Services automatically maintains its own build server farm and can automatically queue up a build for me (for free) every time someone checks in code using the above settings. This build server (and automated testing) support now works with both TFS and Git based source control repositories.
Connecting a Team Foundation Services project to Windows Azure
Once I have a source repository hosted in Team Foundation Services with Automated Builds and Testing set up, I can then go even further and set it up so that it will be automatically deployed to Windows Azure when a source code commit is made to the repository (assuming the Build + Tests pass). Enabling this is now really easy.
To set this up with a Windows Azure Web Site simply use the New->Compute->Web Site->Custom Create command inside the Windows Azure Management Portal. This will create a dialog like below. I gave the web site a name and then made sure the “Publish from source control” checkbox was selected:
When we click next we’ll be prompted for the location of the source repository. We’ll select “Team Foundation Services”:
Once we do this we’ll be prompted for our Team Foundation Services account that our source repository is hosted under (in this case my TFS account is “scottguthrie”):
When we click the “Authorize Now” button we’ll be prompted to give Windows Azure permissions to connect to the Team Foundation Services account. Once we do this we’ll be prompted to pick the source repository we want to connect to. Starting with today’s Windows Azure release you can now connect to both TFS and Git based source repositories. This new support allows me to connect to the “SimpleContinuousDeploymentTest” respository we created earlier:
Clicking the finish button will then create the Web Site with the continuous delivery hooks setup with Team Foundation Services. Now every time someone pushes source control to the repository in Team Foundation Services, it will kick off an automated build, run all of the unit tests in the solution , and if they pass the app will be automatically deployed to our Web Site in Windows Azure. You can monitor the history and status of these automated deployments using the Deployments tab within the Web Site:
This enables a really slick continuous delivery workflow, and enables you to build and deploy apps in a really nice way.
Developer Analytics: New Relic support for Web Sites + Mobile Services
With today’s Windows Azure release we are making it really easy to enable Developer Analytics and Monitoring support with both Windows Azure Web Site and Windows Azure Mobile Services. We are partnering with New Relic, who provide a great dev analytics and app performance monitoring offering, to enable this - and we have updated the Windows Azure Management Portal to make it really easy to configure.
Enabling New Relic with a Windows Azure Web Site
Enabling New Relic support with a Windows Azure Web Site is now really easy. Simply navigate to the Configure tab of a Web Site and scroll down to the “developer analytics” section that is now within it:
Clicking the “add-on” button will display some additional UI. If you don’t already have a New Relic subscription, you can click the “view windows azure store” button to obtain a subscription (note: New Relic has a perpetually free tier so you can enable it even without paying anything):
Clicking the “view windows azure store” button will launch the integrated Windows Azure Store experience we have within the Windows Azure Management Portal. You can use this to browse from a variety of great add-on services – including New Relic:
Select “New Relic” within the dialog above, then click the next button, and you’ll be able to choose which type of New Relic subscription you wish to purchase. For this demo we’ll simply select the “Free Standard Version” – which does not cost anything and can be used forever:
Once we’ve signed-up for our New Relic subscription and added it to our Windows Azure account, we can go back to the Web Site’s configuration tab and choose to use the New Relic add-on with our Windows Azure Web Site. We can do this by simply selecting it from the “add-on” dropdown (it is automatically populated within it once we have a New Relic subscription in our account):
Clicking the “Save” button will then cause the Windows Azure Management Portal to automatically populate all of the needed New Relic configuration settings to our Web Site:
Deploying the New Relic Agent as part of a Web Site
The final step to enable developer analytics using New Relic is to add the New Relic runtime agent to our web app. We can do this within Visual Studio by right-clicking on our web project and selecting the “Manage NuGet Packages” context menu:
This will bring up the NuGet package manager. You can search for “New Relic” within it to find the New Relic agent. Note that there is both a 32-bit and 64-bit edition of it – make sure to install the version that matches how your Web Site is running within Windows Azure (note: you can configure your Web Site to run in either 32-bit or 64-bit mode using the Web Site’s “Configuration” tab within the Windows Azure Management Portal):
Once we install the NuGet package we are all set to go. We’ll simply re-publish the web site again to Windows Azure and New Relic will now automatically start monitoring the application
Monitoring a Web Site using New Relic
Now that the application has developer analytics support with New Relic enabled, we can launch the New Relic monitoring portal to start monitoring the health of it. We can do this by clicking on the “Add Ons” tab in the left-hand side of the Windows Azure Management Portal. Then select the New Relic add-on we signed-up for within it. The Windows Azure Management Portal will provide some default information about the add-on when we do this. Clicking the “Manage” button in the tray at the bottom will launch a new browser tab and single-sign us into the New Relic monitoring portal associated with our account:
When we do this a new browser tab will launch with the New Relic admin tool loaded within it:
We can now see insights into how our app is performing – without having to have written a single line of monitoring code. The New Relic service provides a ton of great built-in monitoring features allowing us to quickly see:
- Performance times (including browser rendering speed) for the overall site and individual pages. You can optionally set alert thresholds to trigger if the speed does not meet a threshold you specify.
- Information about where in the world your customers are hitting the site from (and how performance varies by region)
- Details on the latency performance of external services your web apps are using (for example: SQL, Storage, Twitter, etc)
- Error information including call stack details for exceptions that have occurred at runtime
- SQL Server profiling information – including which queries executed against your database and what their performance was
- And a whole bunch more…
The cool thing about New Relic is that you don’t need to write monitoring code within your application to get all of the above reports (plus a lot more). The New Relic agent automatically enables the CLR profiler within applications and automatically captures the information necessary to identify these. This makes it super easy to get started and immediately have a rich developer analytics view for your solutions with very little effort.
If you haven’t tried New Relic out yet with Windows Azure I recommend you do so – I think you’ll find it helps you build even better cloud applications. Following the above steps will help you get started and deliver you a really good application monitoring solution in only minutes.
Service Bus: Support for partitioned queues and topics
With today’s release, we are enabling support within Service Bus for partitioned queues and topics. Enabling partitioning enables you to achieve a higher message throughput and better availability from your queues and topics. Higher message throughput is achieved by implementing multiple message brokers for each partitioned queue and topic. The multiple messaging stores will also provide higher availability.
You can create a partitioned queue or topic by simply checking the Enable Partitioning option in the custom create wizard for a Queue or Topic:
Read this article to learn more about partitioned queues and topics and how to take advantage of them today.
Billing: New Billing Alert Service
Today’s Windows Azure update enables a new Billing Alert Service Preview that enables you to get proactive email notifications when your Windows Azure bill goes above a certain monetary threshold that you configure. This makes it easier to manage your bill and avoid potential surprises at the end of the month.
With the Billing Alert Service Preview, you can now create email alerts to monitor and manage your monetary credits or your current bill total. To set up an alert first sign-up for the free Billing Alert Service Preview. Then visit the account management page, click on a subscription you have setup, and then navigate to the new Alerts tab that is available:
The alerts tab allows you to setup email alerts that will be sent automatically once a certain threshold is hit. For example, by clicking the “add alert” button above I can setup a rule to send myself email anytime my Windows Azure bill goes above $100 for the month:
The Billing Alert Service will evolve to support additional aspects of your bill as well as support multiple forms of alerts such as SMS. Try out the new Billing Alert Service Preview today and give us feedback.
Summary
Today’s Windows Azure release enables a ton of great new scenarios, and makes building applications hosted in the cloud even easier.
If you don’t already have a Windows Azure account, you can sign-up for a free trial and start using all of the above features today. Then visit the Windows Azure Developer Center to learn more about how to build apps with it.
Hope this helps,
Scott


Tyler Doerksen (@tyler_gd) described how to Manage Azure Subscriptions with Office 365 Users in a 11/7/2013 post:
Azure + Office 365 = Awesome!
Businesses that have adopted Office 365 are looking for more ways to utilize the public cloud to meet their Infrastructure needs. An Azure subscription can provide huge capabilities in terms of hosting Virtual Machines, Virtual Networks, or public websites.
Azure is the clear choice for businesses that are using Office 365, because they can use their O365 accounts to create and manage multiple Azure subscriptions.
Create a new Azure subscription linked to an Office 365 tenant
This is very straight forward. Go to WindowsAzure.com and click on Free Trial then Try it now.
When prompted to Sign in, click on the Sign in with your organizational account link.
Then just simply complete the sign-up process and the Azure subscription will be linked to an Office 365 tenant.
Manage Co-Administrators
Likely there will be multiple people that need access to the Azure services in one organization. With an Azure + Office 365 connected account, Office 365 users can be set as co-administrators on an Azure subscription.
With the Azure Portal, simply navigate to the settings – administrators screen.
Click on the Add button
And enter an Office 365 user
After specifying which Azure subscription the user can administer, they can sign in with their existing Office 365 account name and password.
Summary
More businesses and other organizations are switching to Office 365. With an Azure subscription, an organization can further leverage the cloud to meet their business needs.


<Return to section navigation list>
Windows Azure Pack, Hosting, Hyper-V and Private/Hybrid Clouds
• Mike McKeown (@nwoekcm) reported a New Series on SQL Server on Azure IaaS VMs on 11/10/2013:
I’m starting a new blog mini-series under the category “SQL Server Azure IaaS” to parallel my new moonlighting role developing courseware for Pluralsight. My first course, recently completed and entitled “Hosting SQL Server in Windows Azure IaaS Fundamentals“, is an introductory level course for those new to using SQL Server in an Azure IaaS environment. You can find it at this location. Here is a description of this introductory level curriculum.
This class provides essential knowledge to IT Operations persons working in the Windows Azure environment to set up a simplified version of SQL Server on Windows Azure IaaS. Discusses the different options for installing and configuring SQL Server to ensure you have a basic working configuration. Explains how to configure supplemental data disks and the options to manage a basic SQL Server installation in Windows Azure IaaS. Provides choices on how to backup SQL Server database in the Azure IaaS cloud. Wrap up touching upon a few key topics that you might want to consider that will be covered in the more enterprise-focused advanced SQL Server on Azure IaaS optimization class.
Around the end of this December I will begin work on the follow-on course entitled “SQL Server in Windows Azure IaaS – Optimizations & High Availability” that I plan to complete around the first months or so of 2014. Here is a description of its proposed content.
This course discusses advanced topics for optimizing SQL Server 2012 performance and availability on Windows Azure IaaS Virtual Machines Topics include maximizing SQL Server disk performance within Azure storage, minimizing latency through Azure Virtual Network connectivity, properly securing administrative operations, and designing for high availability in case of failure. These design recommendations are key to correctly implementing configuration of SQL Server AlwaysOn Availability Groups, which are presented as the prime data replication option. As a part of AlwaysOn we discuss and show how to properly configure SQL Server VMs using Azure Availability Sets and Windows Server Failover Clustering (WSFC), SQL Server Availability Groups and Listeners to manage failover between VMs transparently.

Here’s Mike’s first episode: SQL Server on IaaS VM – Introduction:
This is the first post and introduction for the mini-series entitled “Hosting SQL Server in Window Azure IaaS Fundamentals”.
This blog series targets the IT Ops person who is either new to Windows Azure IaaS (Infrastructure as a Service), or has some experience with it, and is wanting to understand the key points to consider when installing and hosting SQL Server on a Windows Azure IaaS Virtual Machine (VM). My goal is to empower personnel from typically a smaller IT department trying merely to accomplish a basic install of SQL Server in the Azure IaaS environment. This person is not concerned about optimizing storage or access, or building in advanced enterprise features like data replication or high availability.
In this introduction I will discuss briefly the terms PaaS (Platform as a Service) and IaaS (Infrastructure as a Service) in terms of Windows Azure and the different levels of involvement, application, and responsibilities when using either in Azure. We’ll look at some of the compelling reasons as to why you would want to consider using SQL Server in an Azure IaaS environment. You will need to have an in-depth and thorough understanding of Azure disks and images which we will give you not only from an Azure standpoint but also how it applies to SQL Server in Azure IaaS. There are four common ways to provision and install SQL Server on Azure IaaS VMs depending upon your licensing scheme and need to preserve existing on premises SQL Server installations. And finally you will need to know the different responsibilities you have for administrating SQL Server on an Azure IaaS VM.
SaaS, PaaS, and IaaS
Let’s touch very briefly on the three common service terms just to make sure you understand them.
- SaaS – Software as a Service. We will not spend any time on Software as a Service in this course. With this model you are just a consumer of the Cloud resources, such as using Office 365 and just paying to use that service.
- PaaS – Platform as a Service. In Azure these are all the services you can leverage for simplifying the building and deploying your Azure Web applications. For instance, ACS, Service bus, HDInsight, WAAD, and Azure SQL Database. Note this the use of SQL Server in Azure IaaS VM in not the same as using Azure SQL Database, which is a PaaS-based relational database service offered by Azure to abstract away the low-level management details of SQL Server. Azure SQL Database is a subset of SQL Server and offered as a database service for you to quickly and easily get SLQ Server functionality for your Azure applications. We are talking here about using an Azure IaaS VM and installing a full version of Microsoft SQL Server – the same one you may use today in your application environment – onto that VM. A common reason why you would use SQL Server over Azure SQL database is scope of functionality. For instance, Azure SQL Database supports only a subset of Transact-SQL for SQL Server. Azure SQL Database does not participate in distributed transactions, and does not use SQL Server agent jobs. And there are other differences as well. So customers will typically SQL Server instead of Azure SQL Database to take advantage of full SQL Server functionality to which they are used to.
- IaaS – This model is where you basically rent one or more virtual servers and their virtual networks (if needed) to host your SQL Server, AD, SPS, etc enterprise services upon. This is what we will be focusing on in this course.
There are different levels of responsibility you assume in each of the models. With SaaS you don’t assume any of the responsibility for the apps, data, OS, network, and storage as it’s all done by the vendor.With PaaS you manage your apps and data, but the vendor manages the rest. In the case of Azure PaaS the vendor is Microsoft of course and they manage the updates as needed. You don’t have to mess with updates and maintenance.For IaaS, you manage more of the stack than PaaS but less than SaaS. You now manage the OS and patching/updating manually. More responsibility lies with the IT Ops team than for the other options.
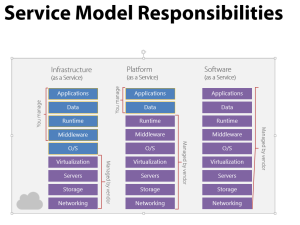
Why SQL Server in IaaS?
So you may be asking why would I want to move my SQL Server installation to an Azure IaaS virtual machine environment. Why not just run it in-house or better yet from a hosting provider? That’s a legitimate question to ask and there are valid reasons why in some cases you may want to remain out of the Azure Cloud. Both the Azure PaaS (Platform as a Service), which is all about your applications and storage in the Cloud, and the Azure IaaS (Infrastructure as a Service), more about Virtual Machines (VMs) and Virtual Networks, provide advantages over running in a public hosting provider or on premises.
- Operation expenditure vs. Capital Expenditures
- Rent vs buy – every three year PC replenish cycle
- Less support duties for IT Ops – at the hardware level such as resourcing hardware, managing uptime, and updates of machines
- Global locality- data and apps near your customers
- Quick provisioning – hours instead of weeks/months. This is especially useful in a testing or development environment where you can quickly spin up various testing configurations
- Auto-scalability and load-balancing for multiple VMs
- Availability SLAs – 99.95% availability for two or more VMs
- Flexible licensing and deployment options to match your budget or licensing strategy. This leads me nicely into this next slide…
These points describe the flexible options for SQL Server deployment into Azure IaaS.
Installing SQL Server on IaaS VM
To use SQL Server on an IaaS VM you will first have to decide how to install it. Remember, with an IaaS VM it’s like your own greenfield system. Outside of a core OS installation, you install, delete, and update, and manage the configuration on the VM all yourself.So we will look at the different ways to get SQL Server running within Azure IaaS.
- You can forklift an existing VHD image or disk with SQL Server already installed into the Azure Cloud.
- You can install a clean Windows Server VM and install SQL Server on it manually.
- You can select one of the standard SQL Server gallery images to give you a Windows VM with SQL Server already installed.
- You can capture an image of an existing Azure VM with SQL Server currently installed as a base image from which you can create multiple VMs running SQL Server.
Administering SQL Server on IaaS VM
Once we have SQL Server installed we will look at different options to administer SQL Server using SQL Server Management Studio run locally, or via remote desktop into the VM hosting SQL Server. We will see how to configure the correct protocols, create inbound firewall rules, configure a login account for use the correct form of SQL Server login authentication, and expose a management endpoint on the SQL Server VM to allow this remote management.An important issue when running SQL Server in the Cloud is how to backup SQL Server. There are different approaches you can take to be able to back-up a SQL Server database running in Azure. After the data is backed up you will want to understand where to store it as well.
And finally, monitoring SQL Server in Azure IaaS. You can do this simply using the Azure Portal to monitor basic VM counters only. Or you can use third party tools, such as Azure Watch, to get more detailed and in-depth monitoring capabilities, including different ways to aggregate the SQL Server performance counter metrics followed by subsequent automated actions that can be triggered by alerts.
The rest of the posts for this mini-series will expand upon most of these topics we discussed here and dig into detail for you.

• Gregory Ness (@Archimedius, pictured below) posted Microsoft Ascends Into The Hybrid Cloud to the Seeking Alpha blog on 11/9/2013:
Based on a recent interview with Microsoft (MSFT) GM Mike Neil:
With Microsoft (MSFT) and VMware (VMW) entering the hybrid cloud battlefield, and the Amazon AWS (AMZN) steam engine continuing to convert more static racks into dynamic services, enterprises are poised to shift massive investments in data center infrastructure purchases into cloud services in the coming years. At least that's the prediction being made by several respected analysts, including Gartner's Bittman (see Private Cloud Matures, Hybrid Cloud is Next, for example).
The shift to the hybrid cloud should drive a massive consolidation of data center and infrastructure buying power into a few dozen service providers and set the stage for the resurgence of software as a strategic IT asset. At the core of the shift are at least three key hybrid cloud benefits, including enhanced agility and operating efficiency. (Here is a hybrid cloud operating model courtesy of the CloudVelocity blog.)
The combination of massive investments in cloud (IaaS) and the inevitable shift to service and software-driven IT takes me back to Microsoft and the third in a series of hybrid cloud blogs based on interviews with key executives, including Microsoft's Azure and the Hybrid Cloud Race and Microsoft and the 2014 Hybrid Cloud Showdown. Microsoft is in perhaps its most pivotal position since the 1980s, this time with giant footprints in device and server operating systems, yet playing catch-up with the amazing strides made by Amazon in establishing the multi-billion public cloud market.
Microsoft no doubt takes great comfort in the hybrid cloud predictions. It is in the hybrid cloud that it has a strategic disruption opportunity that will likely play itself out over the next 3-5 years. When I recently met with Microsoft GM Mike Neil I asked him about the evolution of hybrid cloud and the critical role Microsoft could play in hybrid cloud adoption.
Neil sees several key hybrid cloud catalysts, all related to the levels of confidence, control and predictability that enterprises of all sizes will require before they put mission critical apps in the cloud. Despite the public cloud's success in DevTest and with new apps built for the cloud, improvements in service agreements and security and compliance capabilities will be crucial for widespread enterprise adoption, according to Mike. …

Read the rest of the article here.
Jack Clark also quoted Mike in the Windows Azure Cloud Services, Caching, APIs, Tools and Test Harnesses section above.
<Return to section navigation list>
Visual Studio LightSwitch and Entity Framework 4.1+
• Chris Rummel (@Chris_Rummel) and Rohit Agrawal described New Navigation Features in LightSwitch HTML Client in a 11/7/2013 post to the Visual Studio Lightswitch blog:
Today we’ll be exploring two new features added to LightSwitch HTML Client – global navigation and default details screens. With global navigation you can navigate to any Browse screen from any other screen throughout the LightSwitch application. Default detail screens let you jump directly to the details page of a given entity. We added these to LightSwitch to enable SharePoint social newsfeeds, but you can leverage it even in non-SharePoint applications. There’ll be another blog post later with more details on the social newsfeed feature itself. The following post will demonstrate how you can use global navigation and default details screens in your applications.
Global Navigation
Let’s start off by creating a new LightSwitch HTML application. Attach to an external data source, choose the Northwind OData feed at http://services.odata.org/Northwind/Northwind.svc and import the Customer and Product entities. To demonstrate that global navigation works with screens containing data from an intrinsic (internal) data source as well, add some additional entities using the Data Designer – Order and OrderLine.
This is what the Order and OrderLine entities look like.
Add the following screens to your application – BrowseCustomers, BrowseProducts, BrowseOrderLines and BrowseOrders using the Browse Data Screen template.
Now that our data model and screens are ready, let’s start with using global navigation. Right click on the <ApplicationName>.HTMLClient node (In this example, my application name is ‘Demo’) and select ‘Edit Screen Navigation’.
This will open the Screen Navigation designer. Click on the ‘+ Include Screen’ menu and add all 4 screens. You can exclude a screen from the global navigation menu by right clicking on a screen and selecting ‘Delete’. Deleting a screen from screen navigation designer page will not delete the screen from the project, it will only remove it from the global navigation menu. Renaming a screen from the Screen Navigation page will rename the display name of that screen across your application.
Note: Any screen can be added to the global navigation menu as long as it does not require a parameter. So if you have a screen with a query that returns a set of data and doesn’t require any parameters, then this screen can be added to the global navigation menu structure.
When you run the application your home screen will open first. You can open other screens using the navigation menu button. Note: The navigation menu button will not appear on screens shown as dialogs.
Default Details Screens
Another new navigation feature in LightSwitch are default details screen, which let you navigate directly to the details page of a given entity with a single URL. Let’s use the same application that we created above.
First, add an AddEditOrder screen.
Then add “Add Order” and “Edit Order” buttons to the Browse Orders screen by selecting the corresponding methods addAndEditNew and editSelected in the Add Button dialog.
At this point you should be able to F5 and add a couple Orders with Order Lines for testing. Now we get to the interesting part. Add a View Details screen for Orders.
The “Use as Default Details Screen” checkbox is how LightSwitch decides which screen to show when you link to an entity URL in code (which I will show you below). If you have multiple View Details screens for an entity, you can change the default screen in the client view of the entity designer:
To demonstrate how to get the URL of an entity, on the Browse Order screen, add a new button with a custom button called “GetOrderLink”. You’ll also need a Web Address screen property, I called mine OrderLinkUrl.
Then you can add the property to a new popup. I added the property both as a Web Address Viewer and as a text box – this lets a user either copy and paste the link, or just right-click and select “Add to Favorites”. We’ll write some JavaScript in a minute to make it as easy as possible to get the link for a page. I also changed the display names to be more instructive.
Edit the execute code for the Get Order Link button. Then use this code:
myapp.BrowseOrders.GetOrderLink_execute = function (screen) {
    // The hash is present on non-home screens.  Since we're
    // doing this on the home screen we could skip this part
    // but here it is for completeness.
    var hashPos = window.location.href.indexOf("#");
    if (hashPos >= 0)
        var baseUrl = window.location.href.substr(0, hashPos);
    else
        var baseUrl = window.location.href;
    var fullUrl = baseUrl + "?entity=ApplicationData/Orders(" +
                  screen.Orders.selectedItem.Id + ")";
    screen.OrderLinkUrl = fullUrl;
    screen.showPopup("OrderLinkPopup");
};

myapp.BrowseOrders.GetOrderLink_canExecute = function (screen) {
    return screen.Orders.selectedItem != null;
};
Now you should be able to F5, and after selecting an order, use the Get Order Link button:
If you open the link in a new tab or different browser it should take you right to the order you had selected:
This works for internal and external data sources, the only difference is the data source name. For instance, you can do the same thing with the Customer entities we imported:
myapp.BrowseCustomers.GetCustomerLink_execute = function (screen) {
    var hashPos = window.location.href.indexOf("#");
    if (hashPos >= 0)
        var baseUrl = window.location.href.substr(0, window.location.href.indexOf("#"));
    else
        var baseUrl = window.location.href;
    var fullUrl = baseUrl + "?entity=NorthwindEntitiesData/Customers('" +
        screen.Customers.selectedItem.CustomerId + "')";
    screen.CustomerLinkUrl = fullUrl;
    screen.showPopup("CustomerLinkPopup");
};
myapp.BrowseCustomers.GetCustomerLink_canExecute = function (screen) {
    return screen.Customers.selectedItem != null;
};
Conclusion
With a little bit of code default details screens can be very useful – you can send the links around in email or IMs to show your colleagues exactly what you’re talking about, or bookmark a particular order or customer for later use. If you have automated systems that point users to LightSwitch apps, like an automated dashboard, it’s easy to generate these URLs and make things easier for the users as well.
And with global navigation it is really simple to navigate between several screens across an application. There is no need to create separate buttons to navigate to Browse screens manually.
Keep an eye out for our blog post about SharePoint social newsfeeds, where we’ll show you why LightSwitch implemented these default details screens in the first place! Let us know what you think about these features by leaving a comment below, or come visit us on the forums with any questions.


• Karol Zadora-Przylecki and Ravi Eda described Using the Person Business Type in a 11/5/2013 post to the Windows Azure LightSwitch Team blog:
The Person business type is a new LightSwitch feature introduced in Visual Studio 2013. Its goal is to make it easy to add and manage people-related data in your application. In this post we will show you how to use the Person type and what it can do for you.
Getting Started
Suppose you are building an application to track mobile devices that a developer organization is using for testing applications they write. A device can be either checked out to a specific person or be in storage. Here is what a Device entity might look like in the Data Designer:
In this example we set the Owner and CheckedOutTo properties to be of type Person. Person is a business type, a flavor of .NET Framework string. It is designed to store people’s identities: values that uniquely identify individuals.
You can store any identity value that you want in a Person field, but we make some assumptions about the identity format depending on the authentication type of the application. So if you want the Person type “magic” to work, you’ll want to stick with the defaults:
- For forms authentication, LightSwitch will use the forms login name as the identity value
- For Windows authentication it will be the user’s Windows login name (e.g. “contoso\joesmith”)
- In case of SharePoint-enabled applications, including Cloud Business Applications, the identity is the user’s primary email address
- If your application does not use any authentication and users are anonymous, their identity is represented by an empty string
- There is also a special “TestUser” value that represents the identity of a user running the application in debug (F5) mode
The nice thing is that we give you a simple API to get the identity value for the current user of the application. You can use this API in order to get more information about a person represented by a given identity value. So working with Person properties does not require you to deal with the particulars of the different authentication mechanisms.
Rich Information via Info Properties
The entity class we generate from your data model includes two properties for each Person property: the property containing the raw identity (identity property of type string) and a property ending with an “Info” suffix of type PersonInfo (info property). In our example the identity property “CheckedOutTo” has a corresponding info property named “CheckedOutToInfo”. Similarly, there is Owner-OwnerInfo property pair.
The info property exposes information about a person identified by the corresponding identity property. Info properties are read-only; the source of their data is a directory service. You can use the info property value in your code to write various kinds of business logic. For example, here’s how you can use the entity’s Info property to send an email when a Device is saved:
partial void Devices_Updating(Device entity)
{
    if (entity.Details.Properties.CheckedOutTo.IsChanged
        && !string.IsNullOrEmpty(entity.CheckedOutTo))
    {

        O365PersonInfo owner = entity.OwnerInfo;
        O365PersonInfo currentUser = entity.CheckedOutToInfo;


        if (string.IsNullOrEmpty(owner.FullName)
            || string.IsNullOrEmpty(currentUser.FullName))
        {
            // We could not resolve the owner or the current user of the device.
            // Continue without sending email.
            return;
        }
        string emailBody = "Hey, just FYI, your device " + entity.AssetNumber
            + " (" + entity.Description + ") has been checked out to "
            + entity.CheckedOutToInfo.FullName;

        SendEmail("DeviceTracker@contoso.com",
            entity.OwnerInfo.Email,
            "Device " + entity.AssetNumber + " checked out",
            emailBody);
    }
}
If the identity property contains a value that the directory does not recognize, the info property returns an object that represents the unresolved, raw identity and the full person information will be unavailable.
In Visual Studio 2013, SharePoint-enabled LightSwitch apps (Cloud Business Apps) use either Active Directory or Azure Active Directory (for on-premises vs. cloud-based applications, respectively) to retrieve contact, organizational and security-related information about people. If the application uses Windows or Forms authentication, only basic, security-related information is exposed via info properties.
Current User Data
Information about the current user of the application is available via the User property of the global Application object. In Visual Studio 2013 this property will return an object of PersonInfo type, so you can handle the “current” user and other users in the application in the same way. For example:
partial void Devices_Inserting(Device entity)
{
    // If the Owner has not been set, assume the current user is the owner
    if (string.IsNullOrEmpty(entity.Owner))
    {
        entity.Owner = Application.User.PersonId;
    }
}
We use the PersonId property to retrieve the identity of the current user in a format that is appropriate for the authentication mechanism used by the application.
Filtering Data for the Current User
A common scenario in a business application is to filter data based on the current user. This would show the most relevant data for the user to consume. For example, in the device tracking application we want to have a screen that shows all the devices checked out to the current user. To support this case, two new Global types are introduced in the query designer – Current User and Anonymous User. Current User refers to the user who is currently logged into the app. Anonymous user is one that the server is not able to authenticate.
To use these Global types, use the Query Designer to add a query to the Device table. Add a filter in the query designer. Select “CheckedOutTo” as the left operand. From the operator type dropdown select “Global”. Select “Current User” as the right operand. The filter should be as shown in the screenshot shown below:
Now a screen that uses this query as a data source will display all devices that are checked out to the current user logged in to the app. Note that this filtering can only happen at the server side since current user information is available only at the server.
Working with People Data
There are a few things worth remembering when working with people data and PersonInfo types. First, rich data on people is only available to server-based code. This is particularly important to remember if you have a desktop (Silverlight) client, because in this case the default is to compile entity code (methods such as property_Changed) twice: first in the context of the server project, and second in the context of the desktop client project. (This is so you can write business logic once but LightSwitch can run it from both the client & server side). Any type references that are invalid will cause a build error. The solution is to use a separate entity code file for the client (default is to re-use server code files via a file link in the client project), or to employ conditional compilation. Here is an example of the latter approach:
using System;
using System.Collections.Generic;
using System.Linq;
using System.Text;
using Microsoft.LightSwitch;
#if !SILVERLIGHT
using Microsoft.LightSwitch.Framework.Server;
#endif

namespace LightSwitchApplication
{
    public partial class Device
    {
        partial void CheckedOutTo_Changed()
        {
#if !SILVERLIGHT
            O365PersonInfo currentUser = this.Application.User as O365PersonInfo;

            if (currentUser != null)
            {
                // ... business logic using rich information ...
            }
#endif
        }
    }
}
Second, you are free to store any value in a Person property, including values that are not resolvable. These might be identities that have become invalid, or valid identities that the directory service just does not know how to resolve later. So it’s always a good idea before using any Info property to check whether it was properly resolved. The presence or absence of the FullName is a good way to check this (see our first code example).
Finally, it is not impossible for the same human being to have multiple identities, or for her identity (email address, login name) to change. It is even possible to have the same identity be assigned to a different person. The Person type does not have any specific support for these scenarios, so you are responsible for any checks or compensation logic for those cases. With unrestricted read/write access to raw identity in the Person type, you have the flexibility to do what you want in your business logic.
Person Viewer and Picker Controls
Visual Studio 2013 also introduces two new controls for the Person data type - Person Viewer and Person Picker. These controls are available in an HTML client of a SharePoint-enabled app. A SharePoint enabled app can be either an app that was created using the Cloud Business Application project template or you Enabled SharePoint on your LightSwitch HTML application.
Person Viewer is a read-only control that shows the user’s full name, title, picture and Lync Presence Status. The Person Viewer control uses NameCtrl ActiveX to display Presence Status. The Lync Contact Card is shown on mouse hover on this control. A user can click or tap on this control to navigate to the user’s SharePoint profile site.
In our example, when we create a View Details Screen for the Device entity, this will automatically create the Person Viewer controls. Notice the Person Viewer Control has name, title, and picture shown for “Owner” and “Checked Out To” properties. Presence Status information of these users is also available. A mouse hover on Owner property shows the user Lync Contact Card.
The Person Viewer can display a person in two different ways. The first option (which is the default) shows just the user’s name. The second option shows the title and picture in addition to the person’s name. This choice can be selected in the Screen Designer as shown in the screenshot below:
The Person Picker control is an editable text control. This control is used to search for a person and select one from the results shown in the dropdown. Similar to Person Viewer controls, Person Picker control’s search results can be customized to show just the user name or user name along with title and picture. Using the “Name only” option would just show only full names in search results. The screenshot below shows all the matches for “Karol Z” among the SharePoint users.
The Picker or Viewer control is automatically chosen based on the type of a screen. For example, on a screen that uses the View Details Screen template, a Person type property will use the Viewer control. Whereas, the same property in a screen built with Add/Edit Details Screen template will use the Picker control. You can change this in the Screen Designer.
These controls behave in a certain way depending on the underlying components that are used to integrate SharePoint and Lync. Some of these behaviors are highlighted below:
- The Lync 2013 desktop application needs to be running in the background and you need to be logged in using the same credentials that were used to log into SharePoint.
- If the app is not able to resolve the person correctly then the Viewer control will show the person ID in plain text. Reloading the app should allow it to re-query SharePoint and resolve the person correctly. If the problem persists it is most likely due to SharePoint Cross Domain Library being unable to connect to SharePoint. One reason this could happen is the SharePoint site uses “https” and the app can only run “http” thus putting them in different protection levels.
- NameCtrl is a 32 bit ActiveX control. Such controls have some limitations:
- These work only in 32 bit browsers (IE Desktop, Chrome Desktop and Firefox Desktop). There is a workaround to make these controls work in a 64 bit browser.
- The control must be allowed to run in the browser
If you are using a SharePoint server on premises (not Office 365) then the user’s profile picture in Viewer control will not show. However, the Lync Contact Card will have the correct picture.
Wrapping Up
We hope that the Person type proves useful in your applications. Please install the Visual Studio 2013, try it and let us know what you think by leaving a comment below or visiting the forum.
But wait, there is more! A couple new LightSwitch features leverage the Person type to automatically track the relationship between people and data they have created or modified. These features will be described in an upcoming post so please stay tuned!


 No significant Entity Framework articles so far this week.
<Return to section navigation list>
Cloud Security, Compliance and Governance
 No significant articles so far this week.
<Return to section navigation list>
Cloud Computing Events
No significant articles so far this week.
<Return to section navigation list>
Other Cloud Computing Platforms and Services
• Chris Barclay described AWS OpsWorks for Java in an 11/7/2013 post:
I am pleased to announce that AWS OpsWorks now supports Java applications. AWS OpsWorks is an application management service that makes it easy to model and manage your entire application. You can start from templates for common technologies or build your own using Chef recipes with full control of deployments, scaling, monitoring, and automation of each component.
The new OpsWorks Java layer automatically configures Amazon EC2 instances with Apache Tomcat using sensible defaults in order to run your Java application. You can deploy one or more Java apps, such as a front-end web server and back-end business logic, on the same server. You can also customize or extend the Java layer. For example, you can choose a different Tomcat version, change the heap size, or use a different JDK.
To get started, go to the OpsWorks console and create a stack. Next, add a Java layer. Click Instances in the navigation column, add an instance, and start it.
Tomcat supports HTML, Java server pages (JSP), and Java class files. In this example we’ll deploy a simple JSP that prints the date and your Amazon EC2 instance’s IP address, scale the environment using a load balancer, and discuss how OpsWorks can automate other tasks.
<%@ page import="java.net.InetAddress" %>
<html>
<body>
<%
      java.util.Date date = new java.util.Date();
InetAddress inetAddress = InetAddress.getLocalHost();
%>
The time is
<%
    out.println( date );
out.println("<br>Your server's hostname is "+inetAddress.getHostName());
%>
<br>
</body>
</html>
A typical Java development process includes developing and testing your application locally; checking the source code into a repository; and deploying the built assets to your servers. The example has only one JSP file, but your application might have many files. You can handle that case by creating an archive of those files and directing OpsWorks to deploy the contents of the archive.
Let’s create an archive of the JSP and upload that archive to a location that OpsWorks can access. This archive will have only one file, but you can use the same procedure for any number of files.
- Copy the example code to a file named simplejsp.jsp and put the file in a directory named simplejsp.
- Create a .zip archive of the simplejsp directory.
- Create a public Amazon S3 bucket, upload simplejsp.zip to the bucket, and make the file public. For a description of how to perform this task, see Get Started With Amazon Simple Storage Service.
Now click Apps in the navigation column and then click Add an app.
- In Settings, specify a name and select the Java App Type.
- In Application Source, specify the http archive repository type, and enter the URL for the archive that you just uploaded to S3. It should look something like http://s3.amazonaws.com/your-bucket/simplejsp.zip.
Then click Add App.
Next, click Deploy to deploy the app to your instance. The deployment causes OpsWorks to download the file from S3 to the appropriate location on the Java app server. Once the deployment is complete, click the Instances page and copy the public IP address to construct a URL as follows: http://publicIP/appShortName/appname.jsp.
For the example, the URL will look something like http://54.205.11.166/myjavaapp/simplejsp.jsp and when you navigate to the URL you should see something like this:
Wed Oct 30 21:06:07 UTC 2013
Your server’s hostname is java-app1Now that you have one instance running, you can scale the application to handle load spikes using time and load-based instance scaling. Click Time-based under Instances in the left menu and add an instance. You can then select the times that the instance will start and stop. Once you have multiple instances, you will probably want to load balance the traffic among them. In the Amazon EC2 console create an Elastic Load Balancer and add it to your OpsWorks layer. OpsWorks automatically updates the load balancer’s configuration when instances are started and stopped
It’s easy to customize OpsWorks to change the configuration of your EC2 instances. Most settings can be changed directly through the layer settings, such as adding software packages or Amazon EBS volumes. You can change how software is installed using Bash scripts and Chef recipes. You can also change existing recipes by modifying attributes. For example, you can use a different JDK by modifying the stack’s custom JSON:
{
  "opsworks_java" : {
    "jvm_pkg" : {
       "use_custom_pkg_location" : "true",
       "custom_pkg_location_url_rhel" : "http://s3.amazonaws.com/your-bucket/jre-7u45-linux-x64.gz"
    }
  }
}
A few clicks in the AWS Management Console are all it takes to get started with OpsWorks. For more information on using the Java layer or customizing OpsWorks, see the documentation.

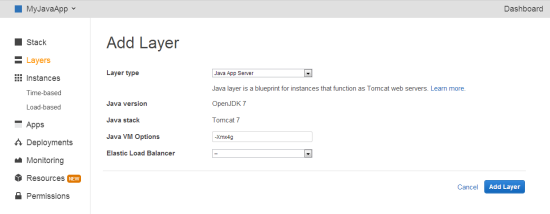
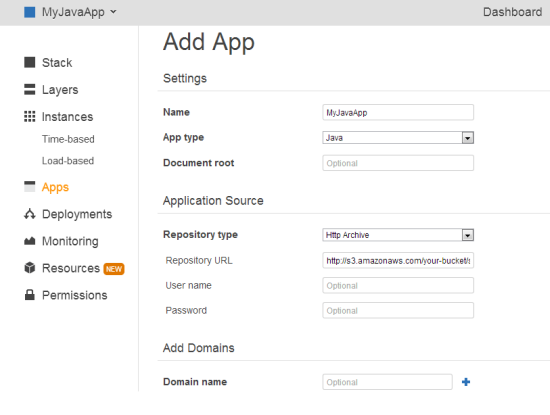
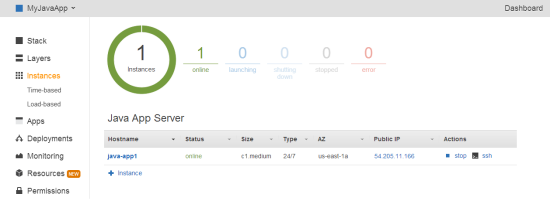
<Return to section navigation list>


0 comments:
Post a Comment