Windows Azure and Cloud Computing Posts for 9/20/2011+
| A compendium of Windows Azure, SQL Azure Database, AppFabric, Windows Azure Platform Appliance and other cloud-computing articles. |

• Updated 9/20/2011 4:00 PM PDT with articles marked •.
Note: This post is updated daily or more frequently, depending on the availability of new articles in the following sections:
- Azure Blob, Drive, Table and Queue Services
- SQL Azure Database and Reporting
- Marketplace DataMarket and OData
- Windows Azure AppFabric: Apps, Access Control, WIF and Service Bus
- Windows Azure VM Role, Virtual Network, Connect, RDP and CDN
- Live Windows Azure Apps, APIs, Tools and Test Harnesses
- Visual Studio LightSwitch and Entity Framework v4+
- Windows Azure Infrastructure and DevOps
- Windows Azure Platform Appliance (WAPA), Hyper-V and Private/Hybrid Clouds
- Cloud Security and Governance
- Cloud Computing Events
- Other Cloud Computing Platforms and Services
Azure Blob, Drive, Table and Queue Services
• Quest Software updated its Welcome to Toad for Cloud Databases Beta Community page on 9/20/2011:
Toad for Cloud Databases is a free SQL-based tool with the familiar look and feel of Toad, which enables users to use SQL with a host of emerging databases that are non-relational, including Hadoop (Hbase & Hive), Cassandra, MongoDB, SimpleDB, and Azure Table Services. [Emphasis added.]
…
Video Tutorials:

• The Bytes by MSDN Blog posted Bytes by MSDN: September 19 - Brian Prince on 9/19/2011:
Dave Nielsen and Brian Prince discuss the advantages of backing up data and files to the cloud. Many mid-sized companies face challenges with the expense of disaster recovery, and don’t realize that they can use the cloud for storage. Dave illustrates how to move files and data to Windows Azure, providiing a secondary back-up in the Cloud. He also points out that companies can deploy applications in the cloud, for business continuity, while getting systems up and going.
Video Downloads: WMV (Zip) | WMV | iPod | MP4 | 3GP | Zune | PSP
Audio Downloads: AAC | WMA | MP3 | MP4
About Brian: Expect Brian to get (in his own words) “super excited” whenever he talks about technology, especially cloud computing, patterns, and practices. That’s a good thing, given that his job is to help customers strategically leverage Microsoft technologies and take their architecture to new heights. Before joining Microsoft in March 2008, Brian was senior director of technology strategy for a major Midwest partner and has over 13 years of expertise in information technology management. His consulting experience includes e-commerce, extranets and business technology for numerous industries, including real estate, financial services, health care, retail, and state government institutions. Brian also has exceptional proficiency in the Microsoft .NET framework, Service Oriented Architecture, building ESBs, and both smart client and web based applications. Brian’s the co-founder of the non-profit organization CodeMash (www.codemash.org) and speaks at various regional and national technology events, such as TechEd. Armed with a Bachelor of Arts degree in Computer Science and Physics from Capital University in Columbus, Ohio, Brian is a zealous gamer with a special weakness for Fallout 3.
About Dave: Dave Nielsen, Co-founder of CloudCamp & Principal at Platform D, is a world-renowned Cloud Computing strategy consultant and speaker. He is also the founder of CloudCamp, a series of more than 200 unconferences, all over the world, where he enjoys engaging in discussions with developers & executives about the benefits, challenges & opportunities of Cloud Computing. Prior to CloudCamp, Dave worked at PayPal where he ran the PayPal Developer Network & Strikeiron where he managed Partner Programs.
Brian Prince and Dave Nielsen recommend you check out:
Alexandra Brown announced CloudBerry Explorer: Azure storage Analytics Log Viewer in a 9/19/2011 press release:
Just about a week ago we introduced CloudBerry Explorer for Azure Blob Storage [with] support for Azure Storage Analytics. In this follow up release we are introducing a Log Viewer. This is a simple tool that helps you look over the log file in a human readable format.
Windows Azure Storage Analytics offers you the ability to track, analyze, and debug your usage of storage. You can use this data to analyze storage usage to improve the design of your applications and their access patterns to Windows Azure Storage. Analytics data consists of:
- Logs - Provide trace of executed requests
- Metrics - Provide summary of key capacity and request statistics
How to use the Log Viewer
Click Analytics in the program menu and then View Log. Note, that first you would have to enable the logs and wait for the log files to start coming as you work with the Azure Storage. On the instruction how to enable the Logs refer to our previous blog post.
The log files will start downloading in the background and show up in the grid.
by default the log files show up for the current week, but you can scroll back with an easy to use data control
+++
Note: this post applies to CloudBerry Explorer for Azure 1.4.1 and later.
CloudBerry Azure Explorer is a Windows freeware product that helps managing Azure Blob Storage. You can download it at http://azure.cloudberrylab.com/
CloudBerry Azure Explorer PRO is a Windows program that helps managing Azure Blob Storage. You can download it at http://www.cloudberrylab.com/default.aspx?page=explorer-azure-pro . It costs $39.99


<Return to section navigation list>
SQL Azure Database and Reporting
• The DBA 24x7 Blog posted Cloud Concept Simplified with SQL Azure Database Administration on 9/19/2011:
Dedicating this article to all those who draw clouds in their minds when people speak of the recent and the most talked about database administration services on the cloud; I want to simplify the whole concept. Cloud is not referred to a person, sky or any other complex thing. It simply refers to the Internet. The fuzzy nature of Internet is brought to use through revolutionary database storage. It means that the cloud database is nothing but database stored sensibly using the Internet space.
Software companies like Microsoft engage in programs that would resource the organization's database needs. Instead of selling the expensive database administration and management programs, which would seldom prove effective for today's database needs, cloud service providers offer programs along with the abstract servers, server hosts, tools and professionals to manage the database administration services on organization's behalf. Honestly, Cloud database services are not for cost saving; however, organizations can, definitely, control cost using them. Depending on the requirement, organizations can choose the plan to limit their daily database expenses.
Cloud database administration is curtailed without Windows Azure.
Cloud database administration is a perfect option for those who want to serve their customer without the hassle of patching and programming. Designed to make your life easier, SQL Azure replaces the physical servers offering convenient storage for databases around the globe. This technique also ensures faster access to data and will cut down on hardware costs. Basically, SQL Azure is highly affordable.
When talking about its peculiar offerings, SQL Azure makes life easier. It is packed with software installation, patching and fault tolerance. It is compatible with T-SQL and old SQL Server models. Saving time, Azure helps you to concentrate on applications, and performs all kind of administering, building and maintaining job.
Azure is a perfect solution for the organizations seeking comfort, relying on professionals for database administration services. In Azure, database administration experts work behind the scenes for the organizations that seek a quick start in serving its customers without spending a huge amount on traditional server and software.
Why choose SQL Azure among all others
For one, I would say that SQL Azure is a Microsoft product, which means high on reliability, tightly integrated and compatible with all other Microsoft products and it makes your world much easier. The second reason would be its scalability and predictability. Also, SQL Azure users have essentially unlimited access to computation and queries at no charge at all.Many other cloud database administration services are differentiated than they seem from the outer side. Amazon offers cheaper services; however, for the light use or moderate load. Meeting all the security challenges, SQL Azure offer protected environment.
How to determine whether SQL Azure is for your business? If you are look for speedy database performance, SQL Azure is the best option. If you do not seek time to learn all about networking, programming and server needs, SQL Azure does it all for you. If you are interested to take your business global, SQL Azure eases the task. So the bottom line is Azure serves everybody!
About DBA-24x7
DBA-24x7 provides SQL reporting service to clients of all sizes without compromising on personal attention to each. An impeccable team at DBA-24x7 offers high performance, secure and managed SQL, MySQL and Oracle services.

<Return to section navigation list>
MarketPlace DataMarket and OData
Jesse Liberty (@JesseLiberty) described Creating an OData Server Quickly in a 9/19/2011 post:
There are numerous ways to access data from Web Services. To explore these we need a simple server that exposes data we can interact with from a Windows Phone Application.
To facilitate this, we’ll build an ASP.NET/MVC 3 application that uses Entity-Framework Code-First (Magic Unicorn Edition) on top of SQLCE4, and we’ll expose the data in a WCF Data Service using the Open Data (OData) Protocol This can be done surprisingly quickly and is highly reusable.
We’ll start with a dead-simple model (and build from there in later postings).
Instant Server – just add code
Create a new ASP.NET / MVC 3 application and name it SimpleServer. At the Project Template dialog, choose Internet Application.
The first task is to add the Entity Framework Code-First library with SQL Server Compact 4.0. This is easily accomplished with NuGet. Open the Add Library Package dialog, click on Online/All and in the search window type EFCodeFirst.SQL – the package you need will come up as shown in the figure.
Click to install and that package and all its dependencies will be loaded into your project. You will need to accept the licenses in the “click to accept” dialog.
Adding the Model
Right click the Models folder and add a new class named Book. Here’s the complete source code for the Book class:
namespace SimpleServer.Models
{
public class Book
{
public int ID { get; set; }
public string ISBN { get; set; }
public string Title { get; set; }
public class BookContext : DbContext
{
public DbSet<Book> Books { get; set; }
}
}
}
Notice that the Book class has no attributes or special interfaces, nor any specific base class. It is a POCO and all that is needed is the Context (BookContext), which we’ll use to access the entities in the application. The only requirement for the context is that it inherit from DbContext and hold one or more DbSet.We need some testing data to expose from our service. The simplest way to get that into our database is to modify the CreateCeDatabaseIfNotExists class in AppStart_SQLCEEntityFramework.cs by adding some seed data to the Seed method
protected virtual void Seed(TContext context)
{
var bookContext =
context as SimpleServer.Models.Book.BookContext;
bookContext.Books.Add( new Models.Book
{
ID = 1,
ISBN = "143023816X",
Title = "Migrating to Windows Phone"
} );
bookContext.Books.Add( new Models.Book
{
ID = 2,
ISBN = "1430237473",
Title = "Programming Reactive Extensions"
} );
bookContext.Books.Add( new Models.Book
{
ID = 3,
ISBN = "0672333317",
Title = "Teach Yourself C++ In 24 Hours"
} );
}
Also in SQLCEEntityFramework.cs, at the top of the file, be sure to uncomment the setInitializer and to replace the context name,
public static void Start() {
DbDatabase.DefaultConnectionFactory =
new SqlCeConnectionFactory("System.Data.SqlServerCe.4.0");
DbDatabase.SetInitializer(
new CreateCeDatabaseIfNotExists<
SimpleServer.Models.Book.BookContext>());
}
Add a new WCF Data Service
to the project (right-click the project / Add New Item / Web / WCF Data Service). Name it BookDataService.Open the codebehind for the service and replace the code for the class with this code that makes debugging easier by including exception details in faults and using verbose errors (remove all of this when the service is working).
[ServiceBehavior( IncludeExceptionDetailInFaults = true )]
public class BookDataService :
DataService< SimpleServer.Models.Book.BookContext >
{
public static void InitializeService(
DataServiceConfiguration config)
{
config.SetEntitySetAccessRule(
"*", EntitySetRights.All );
config.DataServiceBehavior.MaxProtocolVersion =
DataServiceProtocolVersion.V2;
config.UseVerboseErrors = true;
}
}
You can see the output of the service’s collection by browsing to http://localhost:[port number]/BookDataService.svc/Books
Hey! Presto! Instant OData Server.


Jesse is a Senior Developer-Community Evangelist on the Windows Phone Team.
• The MSDN Library published Walkthrough: Accessing an OData Service by Using Type Providers (F#) in 9/2011:
[This documentation is for preview only, and is subject to change in later releases. Blank topics are included as placeholders.]
OData, meaning Open Data Protocol, is a protocol for transferring data over the Internet. Many data providers expose access to their data by publishing an OData web service. You can access data from any OData source in F# 3.0 using data types that are automatically generated by the ODataService type provider. For more information about OData, see Introducing OData.
This walkthrough illustrates the following tasks, which you should perform in this order for the walkthrough to succeed:
- Configure a client project for an OData service.
- Access OData types.
- Query and OData service.
- Verify the OData requests.
To configure a client project for an OData service
Open an F# Console Application project. Add a reference to the Framework assembly System.Data.Services.Client and, under Extensions, the assembly FSharp.Data.TypeProviders.
To access OData types
In the Code Editor, open an F# source file and enter the following code.
open Microsoft.FSharp.Data.TypeProviders

[<Generate>]
type Northwind = ODataService<"http://services.odata.org/Northwind/Northwind.svc/">

let db = Northwind.GetDataContext()
let fullContext = Northwind.ServiceTypes.NorthwindEntities()
In this example, you have invoked the F# type provider and instructed it to create a set of types based on the specified OData URI. Two objects are available that contain information about the data; one is a simplified data context, db in the example. This contains only the data types associated with the database including types for tables or feeds. The other, fullContext in this example, is an instance of DataContext and contains many additional properties, methods, and events.
To query an OData service
Now that you have set up the type provider, you can query an OData service.
OData only supports a subset of the query operations that are available. Supported operations and their corresponding keywords are as follows:.
- Projection (select)
- filtering (where, using string and date operations)
- paging (skip, take)
- ordering (orderBy, thenBy)
- OData-specific operations AddQueryOption and Expand
For a discussion of supported operations, see LINQ Considerations.
If you just want all of the entries in a feed or table, use the simplest form of the query expression, as in the following code:
query { for customer in db.Customers do
        select customer }
|> Seq.iter (fun customer ->
    printfn "ID: %s\nCompany: %s" customer.CustomerID customer.CompanyName
    printfn "Contact: %s\nAddress: %s" customer.ContactName customer.Address
    printfn "         %s, %s %s" customer.City customer.Region customer.PostalCode
    printfn "%s\n" customer.Phone)
Specify desired fields or columns by using a tuple after the select keyword.
query { for cat in db.Categories do
        select (cat.CategoryID, cat.CategoryName, cat.Description) }
|> Seq.iter (fun (id, name, description) ->
    printfn "ID: %d\nCategory: %s\nDescription: %s\n" id name description)
Use a where clause to specify conditions.
query { for employee in db.Employees do
        where (employee.EmployeeID = 9)
        select employee }
|> Seq.iter (fun employee ->
    printfn "Name: %s ID: %d" (employee.FirstName + " " + employee.LastName) (employee.EmployeeID))
Use the [Contains] method to specify a substring condition to the query. The following query returns all products with "Chef" in the name. Also notice the use of GetValueOrDefault. The UnitPrice is a nullable value, so you need to either get the value by using the Value property, or call GetValueOrDefault.
query { for product in db.Products do
        where (product.ProductName.Contains("Chef"))
        select product }
|> Seq.iter (fun product ->
    printfn "ID: %d Product: %s" product.ProductID product.ProductName
    printfn "Price: %M\n" (product.UnitPrice.GetValueOrDefault()))
Use the [EndsWith] method to specify that a string ends with a certain substring.
query { for product in db.Products do
        where (product.ProductName.EndsWith("u"))
        select product }
|> Seq.iter (fun product ->
    printfn "ID: %d Product: %s" product.ProductID product.ProductName
    printfn "Price: %M\n" (product.UnitPrice.GetValueOrDefault()))
Use the && operator to combine conditions in a where clause.
let salesIn1997 = query { for sales in db.Category_Sales_for_1997 do
                          where (sales.CategorySales ?> 50000.00M && sales.CategorySales ?< 60000.0M)
                          select sales }
salesIn1997
|> Seq.iter (fun sales ->
    printfn "Category: %s Sales: %M" sales.CategoryName (sales.CategorySales.GetValueOrDefault()))
The operators ?> and ?< are nullable operators. A full set of nullable equality and comparison operators is available. For more information, see Linq.NullableOperators Module (F#).
Use the sortBy query operator to specify ordering, and thenBy to specify another level of ordering. Notice also the use of a tuple in the select part of the query. This means that the query has a tuple as an element type.
printfn "Freight for some orders: "
query { for order in db.Orders do
        sortBy (order.OrderDate.Value)
        thenBy (order.OrderID)
        select (order.OrderDate, order.OrderID, order.Customer.CompanyName)
         }
|> Seq.iter (fun (orderDate, orderID, company) ->
    printfn "OrderDate: %s" (orderDate.GetValueOrDefault().ToString())
    printfn "OrderID: %d Company: %s\n" orderID company)
Use the skip operator to ignore a specified number of records. Use the take operator to specify a number of records to return. In this way, you can implement paging on data feeds.
printfn "Get the first page of 2 employees."
query { for employee in db.Employees do
        take 2
        select employee }
|> Seq.iter (fun employee ->
    printfn "Name: %s ID: %d" (employee.FirstName + " " + employee.LastName) (employee.EmployeeID))

printfn "Get the next 2 employees."
query { for employee in db.Employees do
        skip 2
        take 2
        select employee }
|> Seq.iter (fun employee ->
    printfn "Name: %s ID: %d" (employee.FirstName + " " + employee.LastName) (employee.EmployeeID))
To verify the OData request
Every OData query is translated into a specific OData request URI. You can verify the OData request URI, perhaps for debugging purposes, by adding an event handler to the SendingRequest event on the full data context object, as shown in the following code:
    // The DataContext property returns the full data context.
    db.DataContext.SendingRequest.Add (fun eventArgs -> printfn "Requesting %A" eventArgs.Request.RequestUri)
The output of the previous code is:
requesting http://services.odata.org/Northwind/Northwind.svc/Orders()?$orderby=ShippedDate&$select=OrderID,ShippedDate
- Tasks: Query Expressions (F#)
- Reference: ODataService Type Provider (F#)
- Other Resources: LINQ Considerations
 See Also
<Return to section navigation list>
Windows Azure AppFabric: Apps, Access Control, WIF and Service Bus
• Alik Levin (@alikl) described Windows Azure AppFabric Caching Under Fire Scenarios in a 9/18/2011 post:
This is a quick list of resources for the under fire scenarios for Windows Azure Caching (Windows Azure is here, SQL Azure here, Service Bus here, and ACS here). Under fire scenarios in my speak is when something needs to be done quickly. Example, fix error, write working code, get up to speed with the folksonomy.
How-To’s
- How to: Create an Azure AppFabric Cache
- How to: Prepare a Visual Studio Project to Use Azure AppFabric Caching
- How to: Configure a Cache Client Programmatically (Azure AppFabric)
- How to: Configure a Cache Client using the Application Configuration file (Azure AppFabric)
- How to: Configure the AppFabric Session State Provider for ASP.NET
- How to: Configure the AppFabric Output Cache Provider for ASP.NET
Error codes
Slides
- AppFabric Caching: How It Works and When You Should Use It
- Windows Server AppFabric Cache: A Methodology for Capacity Planning and Analyzing Performance Data
Videos

• Scott M. Fulton, III (@SMFulton3) posted Build 2011: Windows Azure Tackles the 'One True Login' Puzzle to the ReadWriteCloud blog on 9/16/2011 (missed when published):
This could be a nightmare: another ReadWriteWeb story about "Facebook login." Actually, we're being serious: The way security is ensured in any modern operating system is by authenticating the user, and certifying that processes are only run by certified sources. If cloud services are to play the role of application servers, then every online transaction will need to be certified. And we are far from that point.
The real problem is not that there are too many claims-based identity token formats for developers to keep track of. The problem is that there are more than 20 identity federation protocols, each of whose intention is to serve as the mediator between all the formats. This week at Build 2011 in Anaheim, Microsoft threw in a curious little demonstration in the midst of its Windows 8 "Metro-style apps" news: It showed the simple act of logging onto a remote app. It showed it once.
It was a key moment linking both ends of the Windows scale, small apps with big iron: A feature called the Access Control Service, running on Windows Azure, was enabling a Web app to authenticate a Windows 8 tablet user once, and then retain that authentication for other apps, some of which use different identity services. [Emphasis added.]
"When I log in here, one of the things that I see is a list of identity providers that this app will accept," said Microsoft identity engineer John Shewchuk, holding one of the developers' preview tablets during the Day 2 keynote at Build 2011 on Wednesday. The demo was for a fictitious travel agency looking up flight deals for the user. "That list actually came down from the cloud where the Windows Azure Access Control Service had been configured to support these identity providers. This represents a great opportunity for 'Marquis Travel.' They can dynamically adjust a collection of identity providers that they want to use, by just going up to Azure and configuring the project without all of those Web sites and those different applications." [Emphasis added.]
Shewchuk showed off the Password Broker in Windows 8 to log into an app requiring OAuth identity to let him log on using Facebook. It actually didn't look like anything at all... which was exactly the point. Once the user logs on once, it's not supposed to look like anything.
The basic principle is like this: On the Azure side of the equation is the Access Control Service (ACS), which the Web app contacts to authenticate the user. On the Windows 8 tablet side is the Password Broker. As we learned from a technical session on the subject this week, the Password Broker's login screen obtains a token that can be used to authenticate the same user on multiple other services, by handling the logon process for those other services in the background when necessary.
Microsoft identity engineer Vittorio Bertocci - another favorite of these conferences - explained the process of authenticating the user for rich client applications - the new class of apps that include Metro apps in Windows 8. Such an app does not have the luxury of relying on the browser to manage the session and handle cookies, because there is no browser here. [Emphasis added.]
When a Web app places a call to a Web service, Bertocci explained to an audience of enterprise developers on Thursday (with his characteristic flare for gesticulations and even live doodle-drawing on PowerPoint), whether that service is SOAP or REST, that service expects the correct credentials. It's not going to give any help if it doesn't; it'll simply respond with a 404, and that's the end. The problem there is, authentication services expect the requester to be a browser with a full array of resources, not a Web app that may be managing the session on its own.
"Most of those identity providers will allow users to authenticate exclusively through the use of the browser," said Bertocci. As a result, Web apps end up launching the Web browser anyway just to lead the user through the logon process. The result is a disconnect, he says, between the way you expect to write a rich Web application and the way authentication services expect them to ask for identity tokens.
"Once you get that token, you had better hold it dearly so that you ask the user as little as possible (but not less) to authenticate." Cookies that retain identity tokens are usually managed by the operating system and/or the browser. But all the token formats are different from one another. The danger is the proliferation of more active tokens than there are active users.
Here's where Bertocci introduces the Password Vault. When you sign onto Windows 8 using a Windows Live ID account (some Windows 7 users can do this too), the operating system can authenticate the user through the Live ID service. The service returns an identity token that's placed in the Password Vault. The Vault utilizes a database of authentication URLs that may be used for the same user, with a handful of other services including Facebook, Yahoo, and Google. Now when a Web app needs to authenticate the same user in a different way, it can look to the Vault first to see if an authentication URL request may be placed in the background.
Some authentication services in particular, the Microsoft engineer went on, actually have to be led to believe the user is authenticating by way of a browser. So Windows 8 kind of, well, forges one, in a nice way.
"Facebook wants users to authenticate using a browser. But I'm not using a browser. Well, in Windows 8, since we're aware of the problem, we created one specific tool that you can use for showing the browser a Web surface when you need it."
In other words, the Web Authentication Broker - a new component of WinRT - actually pulls up Facebook's authentication layout as though it were in a browser. That code had to be scaled down, Bertocci said, so the logon process didn't trigger the user's Facebook wall to be displayed.
The ACS will get a big scaling up this week with the release of Version 2 of the Windows Azure Service Bus. Microsoft Senior Vice President for Windows Azure Scott Guthrie explained to RWW the significance of this announcement in an interview on Wednesday: "If you want to build a simple app, or you have a Web role or a back-end worker role processing data - say, an e-commerce site - every time someone places an order, they send a message to the service bus, do an orders queue, and a back-end processor processes it. It's a very simple messaging scenario. You can do that with a whole bunch of different messaging stacks. One of the things that interesting with the Service Bus is, it's fully managed in Azure, so the TCO is really, really low. But also, the way we do authentication... is through a federated identity system." [Emphsis added.]
With such a system, Guthrie explained, a token that authenticates one app may create a chain of trust that's utilized by other providers that attach services to that app. This way, partners can handle part of the order processing, for instance, without the user having to log on yet again.
"The beauty is, I didn't need to redesign my app," remarked Guthrie. "I started with something small and simple, and it could steadily get richer and more involved. I like to say, can we lead people into the pit of success, as opposed to the pit of failure? By baking in federated identity at the base, it's not a [case of], 'Oh, my gosh, we just spent a year rewriting our app.' It's, 'Oh wow, we could actually spend a few hours and bring online this new scenario in a really easy way.' We've gently guided people to build their apps in such a way that they're elastic by default."
ReadWriteWeb at Microsoft Build 2011
- Build 2011: Windows 8 Scales the Cloud Down to Fit in a Tablet
- Poll: How Does Windows 8 Change The Game in Tablet Design?
- Build 2011: Windows Azure Tackles the 'One True Login' Puzzle
- Build 2011: Microsoft's Scott Guthrie on Scaling Azure for Everyone
- Build 2011: The Two Web Browsers, and Five Other Windows 8 Metro Quirks
- Build 2011: Azure, Windows Server 8 to Coalesce on Data, Identity Federation
- Build 2011: Ballmer - 'We Have a Long Way to Go with Windows 8'
- Build 2011: Microsoft - WinRT is the Windows Platform
- Build 2011: What Is WinRT, and Is Silverlight Dead?
- Build 2011: First Glimpse of the Windows 8 App Store


<Return to section navigation list>
Windows Azure VM Role, Virtual Network, Connect, RDP and CDN
No significant articles today.
<Return to section navigation list>
Live Windows Azure Apps, APIs, Tools and Test Harnesses
• The Windows Azure Team announced Cross-Post: Announcing the Release of Windows Azure Platform PowerShell Cmdlets 2.0 on 9/20/2011:
- Improved Support for Hosted Services Management, Affinity Groups, Storage Accounts, Storage and Instance Management.
- Enhanced Diagnostics Support: Manage all aspects of Windows Azure Diagnostics from PowerShell.
- SQL Azure Support: Add/Remove/Update SQL Azure Servers
- Storage Analytics Support: Enable or Disable Storage Analytics for your Storage Account.
- The Access Control Service PowerShell Cmdlets have been merged with the existing Windows Azure PowerShell Cmdlets so you can deploy both in a single installation.
- Some of the cmdlets have been renamed and others have been enhanced in order to follow the PowerShell cmdlets design guidelines more closely.
- The namespaces in the cmdlets solution have undergone substantial change.
In addition, several new and powerful cmdlets have been added. Please refer to Microsoft Technical Evangelist Michael Washam’s post, “Announcing the Release of Windows Azure Platform PowerShell Cmdlets 2.0” and the Windows Azure PowerShell Cmdlets Readme for a full list of new cmdlets and for more information about this release.
Download the Windows Azure Platform PowerShell Cmdlets 2.0.
• Brian Harry described Deleting a Team Project from the Team Foundation Service on Windows Azure in a 9/19/2011 post:
I've seen a few questions come up about this. Two questions, actually:
Question: How do I delete a Team Project Collection on the Team Foundation Service?
Answer: You can't. For now we automatically create one collection per account (called DefaultCollection) and you can't delete it, rename it, add another one or anything else.
Answer: You can but it's ugly. This is one of those unfinished scenarios that helps explain why this is a "preview" and not a finished service. Buck wrote a post on how to do this.

• Brian Harry explained Configuring a build server against your shiny new hosted TFS account in a 9/15/2011 post (missed when posted):
Now that you have a Team Foundation Service account [see post below], some of you are going to be interested in setting up a build machine to work with it. Richard Hundhausen did a very nice video to walk you through this process but I’m going to recap it because there’s a few additional things I want to explain. If you watch his video, it’s higher fidelity than this post but you might get some additional understanding here.
You can install the build server on any machine you use – a workgroup machine at home, a domain machine at work, an Azure VM Role, an Amazon VM, whatever you like. TFS doesn’t really care. The machine just has to have connectivity to the internet to get to tfspreview.com.
Run the TFS installer on the machine you want to install the build controller/agent on and you’ll accept the license, copy the bits on to the machine, etc and then get an install screen like this. Since you are just installing a build server, you don’t want to choose any of the Team Foundation Application Server wizard. You just want the Configure Team Foundation Build Service. Click on “Configure Team Foundation Build Service” and then click the Start Wizard button at the bottom.
You’ll see a welcome page, click Next and see this. If this isn’t what you see, try canceling and make sure you had the right wizard selected. This wants you to identify your team project collection/account on the hosted service. You can’t type here so just click the Browse button.
And you’ll see this. I’ve not connected to a server from this machine before so there’s no server for me to pick from. I click the Servers… button.
And get the list of available servers – see there aren’t any. I told you
So click the Add button.
You can type the full url in the top line if you want but here, I’m using the dialog controls. “minka” (that’s actually the name of my farm
Now I click OK and I go back to the previous window and close that and I see this. For our TFS Service, the team project collection is always called DefaultCollection and you can only have one. In the on premises product you can have more than one and name them whatever you want. Select DefaultCollection and click Connect.
At this point you are connected and the url will be filled in the wizard page above. Click next on that wizard page and you’ll go to the Build Services page. This allows you to configure how many agent you want running. The default is 1 per core but I don’t really need to build 8 things in parallel on my little machine at home so I changed it to 2 and clicked Next.
That takes me to the Settings page which controls how the build service runs on my local machine. Remember the build service itself runs on the machine I’m installing it on and it needs some identity to run as. It’s going to connect to my hosted account with a different identity but more about that in a minute. I created an account on my local machine called “Build”. I could have called it anything I want or used the account I was logged in as. If I had been on a domain, I could have used Network Service but I’m at home so I’m just using a local machine account. BTW, while I was playing with this, I discovered that we don’t support accounts with no password right now. That’s a bug and we’ll fix it. I’m logged in to my 11 year old’s account at home and he doesn’t have a password
The last thing you do is specify what port on your local machine you want the build service to use. This isn’t the port on the hosted service but rather the one on your local machine. The default works for most people.
Then there’s that bit in the middle about authenticating with the hosted service and the Windows Credential Manager. Let’s finish the wizard and then I’ll talk about that.
Click Next and you can review your choices and click Verify. Everything should Verify fine and you can click Configure.
When configuration is done you’ll get a completion screen that looks like this. You can now finish out the wizard and it will launch you into the TFS admin console.
Click on the Build Configuration node on the left and see that you controller and agents are up and running and all is happy. You can close the admin console, go into VS, start creating build definitions and running builds.
Now what about those funny credentials. There’s up to 4 sets of credentials at play here:
- What you are logged into the local machine you are installing as. As long as you have sufficient permissions to install that’s all that really matters.
- The account you configure the local build service to run as. That’s what you entered into the wizard. I used a local account called “Build”. Many people just use the account they are logged in as or, if they are on a domain – Network Service.
- The Live ID that you log into your Team Foundation Service account with. It only plays a part here in that you have to authenticate with the service using that Live ID when you in the connect dialog sequence above. If the system hasn’t saved those credentials you’ll get a Live ID web page to log in. This makes sure that you have permission to configure a build machine against your account. You wouldn’t want random people creating build machines against your account would you?
- The service identity that the build agent uses to connect to your Team Foundation Service account – we sometimes refer to this as the “Project Collection Identity”. This is the bit of magic that the text in the above dialog is about.
Let me expound on #4… The build service, running on your local machine, needs to talk to your hosted account. To do that it needs to authenticate (login). Unfortunately, it can’t use your Live ID because Live ID doesn’t support automated services authenticating. Fortunately, we use Windows Azure Access Control Services (aka ACS) to handle authentication and ACS supports something called service identities that are explicitly designed for this kind of scenario. The build setup wizard you’ve just run uses the Live ID authentication you did when you connected to create a service identity for you and generates a random password. It then puts that password in the Windows Credential Manager for your local build service account.
When I look in my Windows Credential Manager for my local “Build” account, I see:
Note it’s got my url https://minka.tfspreview.com/defaultcollection and an auto generated user name (the name of your ACS service account on the hosted service) – “Account Service (minka)”. And it’s got my auto-generated password. Please, please, please don’t change it. That will only change your local copy (not the one on hosted TFS) and your build service won’t work. Since you don’t know what the auto-generated password is, you can’t set it back. That means you are hosed. the only thing you can do is unconfigure the build service and reconfigure it from scratch.
Let’s look at this in the admin console: If I click the “Properties” link on the build configuration page, I get a dialog like this. I need to click the “stop to make changes” link which stops the local build service while you make configuration changes.
OK, now my local build service is stopped. Notice the two tabs at the bottom. The visible tab, “Service Identity” is actually the account that your local build service runs as on your local machine. My computer is KIDS-PC and the account is Build. I can change that and save the changes and all will be well.
The other tab, “Project Collection Identity” is what account the build service uses to talk with the server (in this case my hosted TFS account). For our hosted TFS service, I have to use an ACS Service Identity and I can’t change it or the password (at least right now). We have not built any feature of the service to change either the ACS service account or its password.
OK, that’s some long gory details about exactly how it works. Most people need never know or care. Run through the wizard and it just “does the right thing” for you. But just in case you ever need to understand what is going on, now you do.


• Brian Harry reported the availability of a VS 11/TFS 11 Developer Preview in a 9/15/2011 post (missed when published):
Yesterday was a pretty crazy day with our new hosted TFS Service going live. I'd stayed pretty focused on that to make sure everything went smoothly. But, in case of some rare anomaly that you missed it, we announced a VS 11/TFS 11 developer preview yesterday as well. They are available to MSDN subscribers on the download center today (well last night, actually) and will be available to everyone tomorrow. Read Jason's blog entry for a good overview: http://blogs.msdn.com/b/jasonz/archive/2011/09/14/announcing-visual-studio-11-developer-preview.aspx
I've already got a series going highlighting some of the new ALM features and I've got a lot more yet to go. Also you can follow the VS ALM team blog to learn more. [See posts below.]

• Martin Woodward described Software Downloads for the Team Foundation Service Preview in a 5/14/2011 post (updated 5/16) to the VS ALM team blog:
You can connect to the Team Foundation Service Preview from a number of applications as well as visiting your account URL at tfspreview.com. In the following post we talk about the client software necessary if you want to connect your development environment to your new Team Foundation Server in the cloud.
- Visual Studio 2010 SP1
To connect and authenticate with the Team Foundation Service Preview you need to install the hotfix KB2581206. If you do not have Service Pack 1 for Visual Studio 2010 installed then you need to install SP1first.- Microsoft Test Manager 2010 SP1
As with Visual Studio 2010, you need to install the hotfix KB2581206 after installing Visual Studio 2010 Service Pack 1 if you do not already have it.- Eclipse
For Eclipse 3.5 and higher (or IDE’s based on those versions of Eclipse) on any operating system (including Mac, Linux as well as Windows) you can install the TFS plug-in for Eclipse which comes as part of the Team Explorer Everywhere 11 Developer Preview.- Build Server (Build Controller and Agent)
To have a build server that talks to the Team Foundation Service Preview, you need to install the Build Service from the latest Team Foundation Server 11 Developer Preview media (Web Install (1Mb), Self Extracting Archive (1.1Gb) or ISO (1.1Gb)- Visual Studio 11 Developer Preview
Also, don’t forget that the Visual Studio 11 Developer Preview has all the bits built in to be able to make use of your Team Foundation Service Preview account. Not only that, some of the great new features of the Team Foundation Service Preview will only light up from the newest version Visual Studio. We are keen to get your feedback on this preview release so download it and give it a go from a test machine and let us know what you think.

• Martin Woodward posted Learning about the Team Foundation Service Preview on 9/14/2011 (missed when published):
As you may have read by now, today is an exciting day. At the BUILD conference we just announced the availability of the Visual Studio Team Foundation Service Preview at tfspreview.com. This is our next generation in application lifecycle management, agile project management and software development collaboration services based on the next version of Team Foundation Server running on the Windows Azure platform. If you want a quick overview of the Team Foundation Service preview then check out this quick video over on Channel 9.
Team Foundation Service Preview Tutorials
For those of you lucky enough to have your invite and want to learn more (or if you want something to do while you wait for one of your friends to invite you) then we just uploaded some video tutorials to Channel 9.
Find out how to get started with tfspreview.com. Once you have your invitation code we show you how to create an account and create your first team project. We then take a look around some of the key feature areas in your Team Foundation Service Preview account. Finally we look at how to install the update into Visual Studio to allow you to connect to the Team Foundation Service Preview from Visual Studio 2010.
Now that you have an account for the Team Foundation Service preview, we look at how to add and configure new members to your teams. We also do a deep dive into the security configuration capabilities of Team Foundation Server and find out how to check the effective permissions of a user or group through the web site.
Some of the powerful new features of the Team Foundation Service preview are the new agile planning tools. We show use of the product backlog tool to easily prioritize work by simply dragging and dropping backlog items in the list as well as how to decompose work on the backlog into epics and stories. Then we look at planning a sprint, entering team capacity and visualizing progress using the burn down charts. Finally, we show how to use the built in task boards to manage the work throughout the sprint while keeping an eye on the progress of your team.
Using Visual Studio, Microsoft Test Manager, and Eclipse
It’s not just about the web. In this video, we look at using the Team Foundation Service Preview from Visual Studio 2010, Microsoft Test Manager 2010 and Eclipse to manage your code and track your work items.
We look at how to configure and use a build server in your own organization for use with the Team Foundation Service Preview. We show how to install and configure the build service and attach it to your service preview account. Then we show how to configure your build server. Finally, we show how to create and manage an automated build from Visual Studio using your newly installed build server and how to access the build results via the web.
The whole reason that we are making this Team Foundation Service Preview available early is so that we can make it better. Therefore we would love to get your feedback.
- For feature suggestions please use our UserVoice site at http://visualstudio.uservoice.com so that others can vote and comment on your idea which helps us see what people like and what common pain points there are that we can help to address.
- For bug reports on the current service preview, or an any Visual Studio products then please use out connect site at http://connect.microsoft.com
- For support questions specific to the team foundation service preview or to join in the discussion with the best of the community then please head on over to the Team Foundation Service Preview support forum where the team will be hanging out.
Keeping up to Date
To keep up to date with the latest developments in the service preview there are a couple of blogs you will want to check in with or better yet subscribe to:
- Visual Studio ALM Blog
This is the blog you are reading now and will contain News and announcements from the Visual Studio ALM and Team Foundation Server team. Now that the Visual Studio 11 Developer Preview and the Team Foundation Service Preview are available expect to see more posts coming to this blog over the next few weeks.- Team Foundation Service Announcements
The latest service announcements and information will be posted here. Part of the preview exercise if is for us to learn how to grow and support the service, we will be aiming for 99.9% uptime by the time we come out of preview, but as we grow and develop the service some growing pains are to be expected - especially at first. If you ever have any trouble accessing the Team Foundation Service Preview then check out this blog to first to see if we are doing some work on it- Brian Harry’s Blog
Brian is a Technical Fellow at Microsoft and he runs the team behind Team Foundation Server and the Service Preview. He blogs about all the latest news from the Visual Studio ALM and Team Foundation Server team along with the occasional post about his farm.- Jason Zander’s Blog
Jason is a corporate vice president for the Visual Studio team in the Developer Division at Microsoft, including Visual Studio Pro, Premium, and Ultimate. That means to say that he is our boss :-). Jason often post announcements about new features or when the latest new stuff is available for you to try.

• MarketWatch reported Intertainment's Ortsbo Records 29% Growth In Unique Users Over Past 30 Days in a 9/19/2011 press release:
Intertainment Media Inc. ("Intertainment" or the "Company") (tsx venture:INT)(otcqx:ITMTF)(frankfurt:I4T) announces that its social media, real time, experiential communications platform, Ortsbo.com (www.ortsbo.com) continues to accelerate growth in September, achieving up to 29% growth over the same period in August 2011, with over 126 Million Minutes of User Engagement, 58 Million Page Views, 24 Million Online Sessions from over 17 Million Unique Users, from over 170 countries and territories during the first half, consisting of the 1st to the 15th, of September 2011.
With the recent launch of Ortsbo's iPhone app, available at iTunes, its Windows Phone 7 app, available in the Windows Marketplace and the upcoming release of its Android app, users are now spending time both on Ortsbo via mobile smartphones and desktop based computers. Mobile metrics are not yet included in the reported Ortsbo results.
Trials of Ortsbo's email solution for Microsoft Outlook have been completed and a series of commercial application will be available shortly.
August 2011 was a very important month as many of the remaining key functions for Ortsbo's transition to the Cloud with Microsoft Windows Azure were completed allowing users to continue to increase translation and communications activities while providing a significant increase in overall user engagement statistics and increasing brand recognition. Ortsbo experienced tremendous spikes in overall usage in August and continues to show record user growth. [Emphasis added.]
Record Results for First Half of September 2011
Ortsbo's social media offering continues to accelerate achieving record results for September 2011 including substantive growth month over month. Ortsbo has found that as new users become more adept with the site, the number of page views diminishes per user, as they do not require any of the support pages to use the site.

<Return to section navigation list>
Visual Studio LightSwitch and Entity Framework 4.1+
• Eric Erhardt described Diagnosing Problems in a Deployed 3-Tier LightSwitch Application in a 9/20/2011 post to the LightSwitch team blog:
There are a number of times when a LightSwitch application works perfectly on a developer’s machine, but as soon as it has been deployed to an Internet Information Services (IIS) machine, it no longer works. Problems can range from IIS not being configured correctly to the database connection string being incorrect. Or an assembly might not have gotten deployed to the IIS machine. I would like to share a few debugging techniques that I regularly use in order to help system administrators diagnose problems in their deployed applications. For more information on how to configure your web server and how to deploy a LightSwitch application, see Beth Massi’s deployment guide.
Before I continue, I’m going to set your expectations correctly. There definitely isn’t a silver bullet that is going to solve any and all problems you will hit when deploying your application. However, what I’m going to provide is a list of steps you can use to diagnose the most common problems we’ve encountered. These steps are the first thing I use when someone stops by my desk and says “I’m having a problem with my application”. If (and when) these steps aren’t able to help you diagnose your problem, they will at least provide you with some good information to take to the forums where others may be able to assist you.
The Dreaded Red X
In the LightSwitch world, the dreaded red X is analogous to the Red Ring of Death on an Xbox 360. OK, so a red X in LightSwitch isn’t as catastrophic. You don’t have to send your app away for a month to get it repaired. But it is a major indication of a problem in your application. When your application fails to load data successfully, the screen will display a red X and the tool tip will say “Unable to load data. Please check your network connection and try loading again.”
These red X’s really mean that an exception was thrown by executing the query.
So what do you do?
A little known secret about LightSwitch is that the server has a Diagnostics subsystem integrated with ASP.NET tracing. LightSwitch’s Diagnostics subsystem is a lot more powerful than just telling you what exception was thrown when issuing a query. You can use it to trace through the actions that were requested of the server, and what steps the server took in response to each action. So even if things seem to be working, you can get more information about what your application was actually doing.
Diagnostics is disabled by default when you create a new LightSwitch application. This is for both performance and security reasons. The performance reason is kind of self-explanatory. Even simple tracing on the server will lower its throughput. The security reasons are because any registered user of your application can get to the diagnostics log when it is enabled and when you enable remote machines to see the diagnostics.
There are 5 app settings that control the behavior of the Diagnostics subsystem:


There are two ways to enable LightSwitch Diagnostics.
Before you publish your app, change the settings in your Web.config.
To change the Web.config, switch your Solution Explorer to “File View”.
Then click on the “Show All Files” tool bar button.
Under the “ServerGenerated” project you will find the “Web.config” file, which you can edit the settings under “configuration/appSettings”.
After you publish your app, change the Application Settings in IIS Manager.
Open IIS Manager and find your web site on the left side. On the right, double click on the “Application Settings” icon under the “ASP.NET” heading.
You will see the Microsoft.LightSwitch.Trace.* settings which can be edited to your desired settings.
Retrieving Diagnostic Information
Once you have enabled diagnostics, you can now inspect the information that is being logged in your application. Remember, any request before tracing was enabled won’t show up in the trace information. So you may need to reload your app in order to get the trace logs populated. ASP.NET provides a web site you can load to view the trace log. The URL of the web site is: <Path To LightSwitch App>/trace.axd. So in my Contoso app above the URL is http://MyServer/Contoso/trace.axd. Navigating to this site shows me the following:
As you can see, LightSwitch made 4 service requests when it was loading my application. The first is a call to “GetAuthenticationInfo”. This is used to see if Access Control was set to None, Windows, or Forms. If it is Forms, LightSwitch displays a Log In screen before displaying the application. The second is the call we are interested in: “Customers_All”. This call executes the Customers query. The last 2 are service calls to get whether the current user can Insert, Update, and Delete certain entity types. In my app this was for the Customer and Order types.
Since I know that the “Customers_All” call is the one causing me problems, I click on its “View Details” link to drill into that call. And here I am greeted with a big red message:
I see an exception has occurred “Login failed for user” and the name of the account my IIS Web Application is running under. This tells me that my application tried using the current account to log into the SQL Server database. However, that account isn’t set up as a user on my database. I forgot to change my connection string when I deployed. It was working fine on my development machine because it was running under my account. But once I deployed, it is now running as a different account that doesn’t have privileges to access the database. Changing the connection string to use valid credentials fixes this issue.
I have just walked you through how to diagnose a very common issue: the database credentials no longer work once the application is deployed out into the wild. However, doing the steps outlined above can help diagnose almost all red X issues popping up in your application. You may not immediately see the problem, like we did above, but it will give you information to build up your knowledge on what is going wrong. Using the Diagnostics subsystem is a trick that every LightSwitch developer should have up their sleeve.
Load operation failed for query 'GetAuthenticationInfo'. The remote server returned an error: NotFound.
So if the red X error described above is ‘dreaded’, the “GetAuthenticationInfo” error message can probably be described as ‘execrated’. (Don’t worry; I had to look it up in a thesaurus.) Many hours inside and outside of Microsoft have been spent trying to debug this error. The problem is, there isn’t just one issue that causes this error. There are seemingly endless issues that cause this error. The reason is explained above. ‘GetAuthenticationInfo’ is the very first service request that LightSwitch is trying to make when your app loads. Thus, if there is any configuration issue with your IIS machine, web app, virtual directory, etc. this error is going to be displayed. Unfortunately, using the diagnostics tracing outlined above isn’t going to help in this situation. More than likely, the service call isn’t even getting into LightSwitch code. As such, our diagnostics isn’t able to log information, since it isn’t getting that far.
So in order to diagnose the problem here, we will use another tool, Fiddler. Fiddler is a tool that every web developer and IT administrator should have at their disposal. It logs all web traffic between your computer and the IIS web server. It will do the tracing that the LightSwitch diagnostics can’t do. Download Fiddler and start the program on your client machine. Then try to load your LightSwitch application again. You should see web requests and responses in Fiddler.
When you start Fiddler, you will see the requests on the left side. To look at the information being exchanged, click on the “Inspectors” tab at the top, and select the inspector for both the request at top and response at bottom. My 3rd request, which was for ‘GetAuthenticationInfo’, returned a ‘500 – Internal Server Error’ response. The text inside shows what the server responded with. Here is says
An application error occurred on the server. The current custom error settings for this application prevent the details of the application error from being viewed remotely (for security reasons). It could, however, be viewed by browsers running on the local server machine.
To enable the details of this specific error message to be viewable on remote machines, please create a <customErrors> tag within a "web.config" configuration file located in the root directory of the current web application. This <customErrors> tag should then have its "mode" attribute set to "Off".
This error message tells us that an error occurred, but the server doesn’t want to display the details of the error. So we need to configure the server to tell us the error. To do this, you can modify your Web.config to add the “customErrors” section it says to add and then re-publish your application. Or you can modify the settings in IIS Manager. In IIS Manager, navigate to your Web Application on the left side. On the right, under "ASP.NET”, double-click on “.NET Error Pages”.
On the far right side, under the “Actions” group, click on “Edit Feature Settings…”
In the Edit Error Pages Settings, select either “Off” if your client is on another machine, or “Remote Only” if you are using the IIS machine as the client.
Now that custom errors are turned off, hit your application again and look at the Fiddler trace. You should still get a “500 – Internal Server Error” message, but the response should give you better information on what the internal server error was. Now I get:
As you can see, the error message is “Unrecognized attribute 'targetFramework'”. Doing a quick Bing search on that error message tells me that I need to make sure the App Pool that is serving my site is set to the 4.0 framework. So to fix this error, I right click my “Contoso” Web Application in IIS Manager and select “Manage Application” –> “Advanced Settings”. This allows me to change my Application Pool from “Classic .NET AppPool” to the correct “ASP.NET v4.0”. After doing that, I reload my application and everything is working again. (Note: When using LightSwitch deployment, the Application Pool will be set correctly. However in my case someone else accidently changed it.)
Conclusion
As I’ve said, these two diagnosis techniques may not solve every issue you can run into after deploying your LightSwitch application. But they are great first steps that can be taken to help you determine what the error you are running into is. And hopefully with that information you will be able to fix the problem yourself, go to Bing and search on the issue, or go to the LightSwitch Forums and use that information to get a faster resolution.


• Gill Cleeren (@gillcleeren) described Developing real-world applications with LightSwitch - Part 6: First steps in LightSwitch Extensibility in a 9/19/2011 post to the Silverlight Show blog:
In the previous articles (5 so far) in this series, we have covered most of the functions that are available in LightSwitch, right out-of-the-box. But LightSwitch is more than that.
Don't miss...
- Recording of Gill's advanced Silverlight 5 webinar
- Recording of Gill's LightSwitch webinar
- The Ebook: Beginners Guide to LightSwitch (MOBI and EPUB formats added)
Throughout the articles, there are several occasions where I mentioned that some topic is an extensibility point. This effectively means that we as developers can write components that we can plug into LightSwitch on those particular places to extend the behavior of the tool.
To build extensions, we have several options. We can build extensions as custom Silverlight controls or we can use the extensibility toolkit. In this article, we’ll look at the first solution. In the next one, we’ll take a look at the latter.
The code for this article can be downloaded from here.
Extending LightSwitch
However, having just what’s in the box might be limiting. That is exactly what Microsoft thought of when they created the tool. Developers may be wanting to use other controls than the once that are coming with the default install. Or they may want to use a different data source (for example use an Oracle database as the data source). Or maybe use a different layout or shell for the application. These are all valid reasons why Microsoft has allowed extending LightSwitch.
When LightSwitch was released, an extra toolkit became available, named the Visual Studio LightSwitch 2011 Extensibility Toolkit (with LightSwitch installed, you can download this for free from http://visualstudiogallery.msdn.microsoft.com/0dfaa2eb-3951-49e7-ade7-b9343761e1d2). When installed, it offers you a project template and several item templates to create a particular extension.
Apart from using the toolkit, we can also use custom Silverlight controls and reference these from a LightSwitch application. This is the focus of this article.
Extensibility points
As mentioned, throughout the article series, we have touched on a couple of points where LightSwitch can be extended. Here’s an overview of the extensibility points.
Business type
A business type can be seen as an extra layer of validation and formatting on top of a normal database type. With LightSwitch, several business types come in the box, including Money, Phone Number and Email Address. Based on the type, new options can appear in the Properties window in Visual Studio. An example is the default domain for the Email Address type.
New business types can be created to wrap additional validation and formatting onto the type. An example can be a temperature in degrees Celsius (which adds “° C” behind the value). Validation could perhaps be that the value should never be lower than -100°C.
Control
A control in LightSwitch refers to several types of controls. A control can be used to group other controls or it can be used to tell LightSwitch how to represent a value. By default, LightSwitch comes with several grouping controls (Rows Layout for example) as well as several item controls (a TextBox).
With the extensibility toolkit, all these controls can be constructed. These controls provide a tight integration with the LightSwitch application.
As mentioned, we can also create custom Silverlight controls and reference these from a LightSwitch application.
Data Source
LightSwitch applications can connect with SQL Server, SharePoint lists and WCF RIA Services. If you need to connect to another data source, extensibility kicks in. Through the use of WCF RIA Services as service layer, you can write code that connects with the external data source. LightSwitch interfaces with the services layer. This way, connecting with external services is transparent for LightSwitch application developers.
Screen template
A screen template is used when building new screens. By merging data with a screen template, screen code gets generated. LightSwitch uses defaults to generate the different fields as a specific control.
We can create new screen templates as well using extensibility. We can define layout properties such as arrangement, colors etc. This way, we have complete control over how the generated screens will be displayed.
Shell
The default shell of a LightSwitch application contains the Save and Refresh buttons at the top and a menu on the left. If we aren’t satisfied with this, we can create a new shell and specify that we want this to be used for our screens. Only one shell can be used in one application. Things like the logo, navigation structure etc can be defined in the shell.
Theme
Silverlight applications can be themed: we can specify which styles are to be used by the controls. We can create a new theme to let the application match the company colors. Using themes, it’s also easy to change the colors for the entire application in one single place.
Using an extension
Creating one of these extensions is the work a developer should do, since quite a lot of coding is required. Once created, these extensions can be used by everyone creating the application, without requiring any additional coding effort.
Once developers start sharing extensions they have been building, we can import these into our application. Let’s take a look at how we can use an extension that’s already been built.
For this demo, we’ll use an extension uploaded to the Visual Studio Gallery (http://visualstudiogallery.msdn.microsoft.com). Download the extension from this page: http://visualstudiogallery.msdn.microsoft.com/58e0f1f4-d2d8-41f9-a4f9-dae70d5826e9. The download contains a *.vsix file that you need to run on your system without having Visual Studio open.
Once ran, open your LightSwitch project in which you want to use the extension and navigate to the Properties. In the extensions tab, if all goes well, your extension should be listed, as shown below. Here we are adding the Luminous controls.
Note that we can select to use this control from now on in any new LightSwitch project we create.
These controls are now available in the application. For example, in the screen designer, we can add a new Group control as shown below.
Here’s an image showing the newly added control in action.
If we want to use an extension that contains shells or themes, we can work in a similar way. For example, download the Spursoft extension at http://visualstudiogallery.msdn.microsoft.com/18114b9a-5290-4766-991e-504ab6cfbda1. Install and activate the extension as explained above. This extension contains a new Shell and several themes. In the General tab of the Properties window, we can select these.
If we run the MoviePolis application now, we see the following.
Now that we have used controls and themes created by someone else, let’s take a look at how we can create our own.
Creating Silverlight custom controls
To finish this article, we’ll create our own extension. We’ll use the toolkit in the next article, so here we will use an often easier approach: a Silverlight custom control. Assume that people selling tickets can only open the LightSwitch application, they are not allowed to have a browser open on their PCs. However, at times during the day, ticket sales are slow, so the management has decided they are allowed to have a controlled browser environment on their machine. Since Silverlight has a WebBrowser control, we can make a Silverlight custom control with a small browser baked-in and add a screen with this control on it. Note that a WebBrowser control only works in out-of-browser applications. However, we are going to have the LightSwitch application run standalone so that won’t be a problem. Let’s take a look.
Add a new project to the solution. Make it a Silverlight Class Library. Here, I’ve named it SLExtensions. Make it a Silverlight 4 library in any case.
In the project, delete the default generated Class1.cs and add a new Silverlight User Control. I’ve named this control BrowserControl.xaml as shown below.
We can now write some code for this control. The code below creates a very simple browser, based on the Silverlight WebBrowser control.
<UserControl x:Class="SLExtensions.BrowserControl"xmlns="http://schemas.microsoft.com/winfx/2006/xaml/presentation"xmlns:x="http://schemas.microsoft.com/winfx/2006/xaml"xmlns:d="http://schemas.microsoft.com/expression/blend/2008"xmlns:mc="http://schemas.openxmlformats.org/markup-compatibility/2006"mc:Ignorable="d"d:DesignHeight="300" d:DesignWidth="400"><Grid x:Name="LayoutRoot" Background="White"><Grid.RowDefinitions><RowDefinition Height="40"></RowDefinition><RowDefinition Height="*"></RowDefinition></Grid.RowDefinitions><StackPanel Grid.Row="0" Orientation="Horizontal"VerticalAlignment="Center"><TextBlock Text="Address:" Margin="5"VerticalAlignment="Center"></TextBlock><TextBox Text="Enter URL" Width="300" Margin="5"Name="AddressTextBox"></TextBox><Button Content="Go" HorizontalAlignment="Center"VerticalAlignment="Center" Margin="5" Name="GoButton"Click="GoButton_Click" ></Button></StackPanel><WebBrowser Grid.Row="1" Name="MainWebBrowser" Width="1000"Height="800"></WebBrowser></Grid></UserControl>In the code-behind, add the following code. This code simply checks if the URL starts with http:// and adds it if not. Finally, it sets the source of the WebBrowser control.
private void GoButton_Click(object sender, RoutedEventArgs e){string uri = string.Empty;if(AddressTextBox.Text.Length > 0){uri = AddressTextBox.Text;if(!uri.StartsWith("http://"))uri = "http://" +AddressTextBox.Text;MainWebBrowser.Source = new Uri(uri, UriKind.Absolute);}}Now, build the solution. In the LightSwitch application, add a new screen, but don’t add any data to it, as shown below. The screen template you select is of no importance. Give the screen a meaningful name (I’ve named it BrowserScreen). In the screen designer, select to add a New Custom Control, as shown below.
This will open a dialog, asking you which control you want to add.
Click on the Add Reference button and select the SLExtensions project.
Within this project, select your user control, as shown next.
Your new control will now be used on the screen.
Run the application now and navigate to the Browser screen. We can enter a URL, hit the Go button and the page will be shown.
We have successfully created a new custom Silverlight control and added it to LightSwitch.
Summary
In this article, we’ve taken a look at the options we have at our disposal to create extensions in LightSwitch applications. We’ve installed and used several of these and created a custom Silverlight control to be used from a LightSwitch application.
In the next article, we’ll be using the extensibility toolkit to create more extensions!
About Gill Cleeren
Gill Cleeren is Microsoft Regional Director (www.theregion.com), Silverlight MVP (former ASP.NET MVP), INETA speaker bureau member and Silverlight Insider. He lives in Belgium where he works as .NET architect at Ordina. Passionate about .NET, he’s always playing with the newest bits. In his role as Regional Director, Gill has given many sessions, webcasts and trainings on new as well as existing technologies, such as Silverlight, ASP.NET and WPF at conferences including TechEd Berlin 2010, TechDays Belgium, DevDays NL, NDC Oslo Norway, SQL Server Saturday Switzerland, Spring Conference UK, Silverlight Roadshow in Sweden… He’s also the author of many articles in various developer magazines and for SilverlightShow.net. He organizes the yearly Community Day event in Belgium.
He also leads Visug (www.visug.be), the largest .NET user group in Belgium. Gill recently published his first book: “Silverlight 4 Data and Services Cookbook” (Packt Publishing). You can find his blog at www.snowball.be.


Return to section navigation list>
Windows Azure Infrastructure and DevOps
• Thomas Pfenning described Storage and Continuous Availability Enhancements in Windows Server 8 in a 9/20/2011 post to the Microsoft Server and Cloud Platform Blog:
Greetings from the Storage Developer Conference, where I had the opportunity to introduce attendees to some of the new storage capabilities in “Windows Server 8.” Following Bill Laing’s post introducing the product, I would like to share more about our investments to give customers more unified, flexible, and cost-efficient solutions that can deliver enterprise-class storage and availability.
Windows Server 8 will provide a continuum of availability options to protect against a wide range of failure modes in different tiers – storage, network, and compute. These options will enable higher levels of availability and cost-effectiveness, as well as easier deployment for all customers – from small business to mid-market to enterprises - and across single servers, multiple servers, and multi-site cloud environments. Windows Server 8 delivers on continuous availability by efficiently utilizing industry standard storage, network and server components. That means many IT organizations will have capabilities they couldn’t previously afford or manage.
For example, at the conference we are highlighting our work with the SMB 2.2 protocol - a key component of our continuously available platform. SMB 2.2 transparent failover, along with SMB 2.2 Multichannel and SMB 2.2 Direct, enables customers to deploy storage for workloads such as Hyper-V and SQL Server on cost efficient, continuously available, high performance Windows Server 8 File Servers.
Below are some of the key features we’re delivering in Windows Server 8 involving SMB 2.2.
Transparent Failover and node fault tolerance with SMB 2.2. Supporting business critical server application workloads requires the connection to the storage back end to be continuously available. The new SMB 2.2 server and client cooperate to provide transparent failover to an alternative cluster node for all SMB 2.2 operations for both planned moves and unplanned failures.
Fast data transfers and network fault tolerance with SMB 2.2 Multichannel. With Windows Server 8, customers can store application data (such as Hyper-V and SQL Server) on remote SMB 2.2 file shares. SMB2.2 Multichannel provides better throughput and multiple redundant paths from the server (e.g., Hyper-V or SQL Server) to the storage on a remote SMB2.2 share. Network path failures are automatically and transparently handled without application service disruption.
Scalable, fast and efficient storage access with SMB2 Direct. SMB2 Direct (SMB over RDMA) is a new storage protocol in Windows Server 8. It enables direct memory-to-memory data transfers between server and storage, with minimal CPU utilization, while using standard RDMA capable NICs. SMB2 Direct is supported on all three available RDMA technologies (iWARP, InfiniBand and RoCE.) Minimizing the CPU overhead for storage I/O means that servers can handle larger compute workloads (e.g., Hyper-V can host more VMs) with the saved CPU cycles.
Active-Active File sharing with SMB 2.2 Scale Out. Taking advantage of the single namespace functionality provided by Cluster Shared Volumes (CSV) v2, the File Server in Windows Server 8 can provide simultaneous access to shares, with direct I/O to a shared set of drives, from any node in a cluster. This allows utilization of all the network bandwidth into a cluster and load balancing of the clients, in order to optimize client experience.
Volume Shadow Copy Service (VSS) for SMB 2.2 file shares. Remote VSS provides application-consistent shadow copies for data stored on remote file shares to support app backup and restore scenarios.
Alongside our SMB 2.2 Server implementation in Windows Server 8, we are working with two leading storage companies, NetApp and EMC, to enable them to fully integrate SMB 2.2 into their stacks and provide Hyper-V over SMB 2.2 solutions. Having NetApp and EMC on board not only demonstrates strong industry support of SMB 2.2 as a protocol of choice for various types of customers, but also highlights how the industry is aligned with our engineering direction and its support for our Windows Server 8 storage technology.
There is so much more to share about our work in Windows Server 8 storage and availability. Look for more from me soon!
Thomas is General Manager, Server and Tools for Microsoft. You can expect Windows Azure to run Windows Server 8 near its release date.
• Jon Brodkin (@JBrodkin) reported Only enterprise and developers can bypass Windows Store for Metro apps in a 9/19/2011 post to the Ars Technica blog:
Microsoft will restrict general distribution of Metro apps to the Windows Store, but grant exceptions to enterprises and developers, allowing them to side-load applications onto Windows 8 devices. While Windows 8 will be an operating system for both desktops and tablets, Microsoft is creating two sets of rules for traditional desktop apps and Metro-style apps, which are optimized for touch screens but will run on any Windows 8 device.
A primer for Windows developers on Microsoft’s website states that distribution of traditional desktop applications will proceed as usual. “Open distribution: retail stores, web, private networks, individual sharing, and so on” will be allowed, Microsoft says. Metro apps, on the other hand, will be “Distributed through the Windows Store. Apps must pass certification so that users download and try apps with confidence in their safety and privacy. Side-loading is available for enterprises and developers.”
This approach is similar to the one taken by Apple with its iPhone and iPad App Store, and also similar to Microsoft’s own Windows Phone 7 Marketplace, although jailbreaks and workarounds allowing side-loading have been released by independent developers for both iOS and WP7. With Google’s Android, by contrast, it is easy for any user to install non-market applications from either third-party app stores such as Amazon’s or by downloading software directly from an app maker’s website. The exceptions carved out by Microsoft will let developers test apps and businesses distribute custom or private apps to employees.
Windows Phone 7 uses a 70/30 revenue split in which Microsoft keeps 30 percent of app payments, and a similar split seems likely for Windows 8 Metro apps. According to the IStartedSomething.com blog, Microsoft’s primer for Windows developers briefly confirmed the 70/30 split for Metro apps but later deleted the information. In other news, we learned last week that while Windows 8 devices with ARM processors won’t run apps originally built for Intel-based computers, Microsoft is working on a Metro version of its popular Office software.
 The Primer for Current Windows Developers by Kraig Brockschmidt offers much more than Metro app distribution details. Topics include:
• David Linthicum (@DavidLinthicum) asserted “COEs are great for controlling new technologies -- but that's not what the cloud is about” in a deck for his The downside of cloud centers of excellence post of 9/20/2011 to InfoWorld’s Cloud Computing blog:
I meet these people all of the time: They're charged with starting a COE (center of excellence) around the use of cloud computing in an enterprise. But will these ad hoc organizations provide the value that everyone expects?
Cloud computing is a very different animal than previous technology trends. If you've created one before, a COE might seem like the right approach, but I believe the use of cloud computing should be more of a change in how things are done, rather than a change in the technology itself. …
Indeed, cloud computing is about doing the same tasks more efficiently. For example, the cloud uses the same storage seen in data centers, but now those systems are hosted in public clouds. The same goes with app dev and test on PaaS (platform-as-a-service) clouds and in using SaaS (software-as-a-service) instead of costly enterprise applications.
The problem is that COEs by their very existence want to define new technology -- and the best use of it -- in the enterprise. In other words, they want to control the adoption process as if the technology were a jarring shift. Again, cloud computing is all about doing the same things, but in a more efficient manner.
Because COEs typically will want to control most new uses of cloud computing within the enterprise, they actually make the use of cloud computing technology harder. This may slow down the adoption process and reduce the speed to cloud computing's payoff.
Enterprises should hire employees and consultants who understand how to create a cloud computing strategy and how to implement cloud computing offerings. They shouldn't waste time and money on a cloud COE.

<Return to section navigation list>
Windows Azure Platform Appliance (WAPA), Hyper-V and Private/Hybrid Clouds
• Thomas W. Shinder (@tshinder) published Introduction to Infrastructure as a Service by Bill Loffler to the Private Cloud TechNet Blog on 9/20/2011:
Private Cloud is all about being a service provider and one of the core services you’ll want to provide is Infrastructure as a Service (commonly known as IaaS). Infrastructure as a Service, or IaaS is the industry term used to describe the capability to provide computing infrastructure resources in a well-defined manner, similar to what is seen with public utilities.
If you would like to learn more about Infrastructure as a Service, then let me recommend a presentation that my esteemed colleague, Bill Loeffler (pictured on the left), gave to our MVPs a few weeks ago.
Bill provides an excellent overview of the architectural components of private cloud and draws a clear line between how business is done in a traditional data center and how private cloud changes the way we think about service delivery.
To download Bill’s webcast, click HERE.
Let us know what you think about IaaS! You can participate in the conversation by using the comments section on this blog or start up a topic in the TechNet Cloud Computing Forums.
After this presentation whets your appetite, follow up on what you learned by checking out two excellent articles on IaaS:


• Wely Lau posted A Deep Look inside Windows Azure Virtual Machines on 9/12/2011 (missed when published):
As I believe most people are aware that our application on Windows Azure is actually running on VM (Virtual Machine) that sits on top of Windows Azure Hypervisor, inside a Microsoft Datacenter.
The objective of this post is to explain the under-the-hood or deep view of what’s actually inside Windows Azure Virtual Machine.
Please do not confuse [the subject of] this post with the VM Role. This post is purely discussing the Virtual Machine of pre-provisioned by Windows Azure, specifically the Worker Role and Web Role. VM Role is another role type other than Web Role and Worker Role.
Fabric Controller – the “kernel” of the Cloud OS
Before moving on what inside the VM, I will explain what the Fabric Controller is, what it does, and how it relates to Windows Azure VM.
The Fabric Controller is actually a Windows Azure service that is acting as the kernel on the Windows Azure Platform itself. It manages the data center’s hardware as well as Windows Azure services. The Fabric Controllers run on nodes that are be spread across fault domains in the hardware. In order to ensure high availability and multiple-fault tolerance, the Fabric Controller has at least 5 instances; in many cases it may be more.
Specifically, the main responsibilities are:
- Data Center Resource Allocation. The Fabric Controller manages the resource allocation over the hardware in a Windows Azure datacenter including the blades and network. When you specify your service (VM Size, number of instance, fault domain, upgrade domain), the Fabric Controller is intelligent enough to allocate appropriate resource inside the datacenter.
- Data Center Resource Provisioning. When an appropriate node is found, the next step is to provision the VM for host our application to ensure the application and OS are up and running. The provisioning process includes powering-on the node, performing a PXE-boot maintenance OS, downloading host OS, runnin sysprep, and eventually connecting the Fabric Controller to the host agent.
- Service Lifecycle Management. When you deploy your application on Windows Azure (regardless through portal or management API), your service package is actually passed to a service, namely RDFE (Red Dog Front End). The RDFE then subsequently send your service package to Fabric Controller based on target region. The Fabric Controller will then deploy your service accordingly given inputs that you’ve defined in Service Configuration and Service Definition files.
- Service Health Management. When the service is successfully deployed, the responsibility of Fabric Controller is not done yet. However, it will manage and monitor the health of the VM. The monitoring process typically works by sending the heartbeat from guest OS to host OS and subsequently host OS to Fabric Controller. The Fabric Controller will then act appropriately should it encounters any issue.
Understanding what the Fabric Controller is, we can now move to our core topic about the Windows Azure VM.
Pre-provisioned VM sits on Hypervisor
A Windows Azure VM (regardless it’s web or worker role) is actually a pre-provisioned VM that is automatically placed and booted on top of Hypervisor, a custom version of Hyper-V to satisfy the needs. In the picture it’s reflected as “Guest VM”. This is actually the place where our service hosted on. The Guest VM will communicate to Root / Host VM to perform necessary management task such as as heartbeat-pinging.
Operating System Versions
At the moment, Windows Azure supports two type of operating system, namely:
- Windows Server 2008 (64 bit)
- Windows Server 2008 R2 (64 bit)
You can specify your preferred OS on either:
1. Service Configuration files by entering osFamily and osVersion attributes.
osFamily 1 represents Windows Server 2008, while 2 represents Windows Server 2008 R2.
On the osVersion, this is the setting where you tell Windows Azure, which version of OS your Guest VM will be using. Specify it with * (star) sign means Windows Azure will automatically upgrade the Guest VM OS when there’s new OS released. However, in some case customer does not want it to be automatically updated, then you can select the specific version of OS as could be found here.
2. Windows Azure Portal
You can also use user interface in Windows Azure Portal to select your preferred OS family and version.

What are the differences? Which configuration should I choose?
A few notable differences are relevant to Windows Azure. Some command utilities exist in Windows Server 2008 R2 but not in Windows Server 2008, for example: tzutil command to set the timezone.
There are indeed some more differences for each OS. I recommend that you review more detail here.
VM Sizes
VM Size defines the hardware specification of VM you want Windows Azure to provision to you. There are 5 available VM Size at this moment from Extra Small all the way to Extra Large. Obviously, the higher specification the more expensive.


Extra Small VM Size
Extra Small VM Size was announced at PDC 2010 with a more affordable price. Selecting Extra Small VM in a development or testing environment is OK. However, it is not recommended to use the Extra Small VM in Production environment.
VHDs (Virtual Hard Drives) inside Windows Azure VM
Windows Azure will provide three VHD images when a role is provisioned.
- C Drive – Local Storage Drive. This drive is to store temporary file such as logs or to store local resource. The size of this VHD varies from 20 GB (Extra Small) to 2 TB (Extra Large) depending on what VM Size you choose. We can utilize this local resource drive to store temporary file, but keep in mind that it’s considered not persistence.
- D Drive – OS Drive. The D Drive is to store the Operating System files. The foldering structure is as almost similar to the on-premise OS. It has Program Files, Windows, etc.
- E Drive – Application’s code. The E Drive is the place for Windows Azure to store our application code. Our code will typically to be placed inside the “approot” folder.
Runtime Installed
As a PAAS (Platform as a Service) cloud provider, Windows Azure will take care of the OS and runtime levels. There are several pre-installed runtimes in the Windows Azure VM:
- NET 3.5 SP1
- NET 4
- ASP.NET
- VC80 CRT (8.0.50727)
- VC90 CRT (9.0.30729)
- URL Rewrite Module 2.0
- VC10 CRT (e.g. MSVCR100.DLL) is not fusion-ized and can be packaged together with the application
In the future, there’s a plan (as mentioned by Mark) from Microsoft that Java will be pre-installed as well.
References
- Inside Windows Azure VM – Hoi Vo (PDC 2010) http://channel9.msdn.com/Events/PDC/PDC10/CS63
- Inside Windows Azure – Mark Russinovich (PDC 2010) http://channel9.msdn.com/Events/PDC/PDC10/CS08
- Inside Windows Azure – Mark Russinovich (TechEd NA 2011) http://channel9.msdn.com/Events/TechEd/NorthAmerica/2011/COS301

Wely is a developer advisor in Developer and Platform Evangelism (DPE), Microsoft Indonesia.
Minor edits were made to the preceding post. The above is the core of the WAPA that Microsoft supplies to customers, such as eBay and Fujitsu.
<Return to section navigation list>
Cloud Security and Governance
• Paul Venezia (@pvenezia) asserted “Cloud computing not only distributes resources, it distributes risk -- widely” in a deck for his The cloud hazard no one talks about article of 9/19/2011 for InfoWorld’s The Deep End blog:
I've been pretty cynical about the cloud and the relentless marketing drumbeat behind it. But I have to admit that the migration to the cloud is happening at a pace faster than I thought possible. Microsoft's full-on cloud mentality with Windows 8 provides only the most dramatic recent evidence.
But I'm not sure that we've spent enough time thinking through the implications.
The upside of using a public cloud service is easy to understand. No need for expensive local storage, no need for local servers, a reduction in power and cooling expenses ... and a reduction in IT staffing. When all you need to do is click around on a self-service portal to spin up new server instances with your provider, you don't need to worry about racking boxes or even managing your own VMs. You let "them" handle all of that. What could be better?
Good question. In large part, the answer depends on data speeds, latency, and availability. These days, many more urban locations have fiber out the wazoo, and you can get 100Mb and even gigabit data circuits for less than what a T1 costs. With the expansion and interconnection of these networks, latency between offices and service providers may be just slightly higher than between local LAN segments, making the cloud provider seem to be present in your building, not 500 miles away. That's the core value propostion: A public cloud service has to look and feel like a local resource to succeed.
But guess what? Those high-end pipes aren't available everywhere, and without them, the value prop begins to erode.
Then there's the vastly more important question of availability. Sure, the latency between your offices and your cloud provider may be just 10ms or so, but what happens when some jackass with a backhoe in the next state makes that latency infinite? Suddenly you may have hundreds of employees with literally nothing to do. Today, loss of Internet connectivity still allows employees to work on local servers, access files on local storage, or in some cases, continue using virtual desktops served by a virtualization cluster in the backroom. If all of those services are on the other end of a severed fiber link, then everything comes crashing to a halt.

Read more: next page ›, 2
<Return to section navigation list>
Cloud Computing Events
• The San Francisco Bay Area Azure Developers group reported on 9/19/2011 that they will present Moving B2B Software with Existing Customer Presence to Azure on 9/20/2011 at the Microsoft San Francisco office (Westfield Mall):
Warning - if you have seen a memo, presentation, or have heard statement from management that says "this year, we will move our flagship product to the cloud"... we need to talk.
Details:
For three developers with a new customer base, Visual Studio, and an espresso machine, jumping into the cloud is one sort of problem. But what if you have an established product with thousands of customers? What if your business thrives on perpetual licenses that live "on premises"?
We need to talk about building a relevant roadmap into “the cloud.” We’ll talk about what Azure can do for you, how to assess the costs associated with software design choices in Azure, how to license (and transition licenses) into “the cloud,” and how “the cloud” will transform your business practices. We’ll also explore how the “law of unintended consequences” may turn up opportunities and raise blood pressures where you’d least expect it.
Bio:
Gregg Le Blanc is a master’s degree chemical engineer with over a decade of product management, software architecture, user experience research, and technology roadmap planning. He developed deep insight into customer business and technology issues surrounding the development and adoption of real-time infrastructure software for process manufacturing, power generation and distribution industries.
Gregg started F5Direct.com in order to work with a broader range of customers on issues ranging from re-envisioning their user experiences, user community building, developing quantitative sustainability practices, wind energy forecast improvement, and of course software packaging, pricing, and licensing programs.
Gregg has been a software conference keynote and regional seminar speaker alike. He is also an actor and an award winning photographer whose work has been published in a number of magazines.
Food and Drink Sponsor:
Pizza and soft drinks have been sponsored by AppDynamics, "...the leading provider of application management for modern application architectures in both the cloud and the data center..." AppDynamics will provide a 5 minute technical overview of their new offerings that support Azure.
Please contact the security guard in the 1st floor lobby after 6:00 p.m. to access Microsoft on the 7th floor.
Eric Nelson (@ericnel) reported on 9/20/2011 Windows Azure BizSpark Camp on Friday 30th Sep in London:
I will be presenting “Azure goodness” at another (no doubt) excellent BizSpark camp at the end of the month. The plan is to create a new session for this event, provisionally “The 10 most asked questions about Windows Azure” (with hopefully some detailed answers!). Oh and more importantly, we hope to have a colleague from the US over to impress
.
“Microsoft BizSparkCamp
The current economic climate is putting many entrepreneurs under increasing pressure, making it critical to find new resources and ways to reduce costs and inefficiencies.
Microsoft BizSparkCamp for Windows Azure Platform is a day designed to offer the following assistance to entrepreneurs, in particular, the CTOs and developers/architects within Technology Startups.
More details and how to register.”
Related Links:

<Return to section navigation list>
Other Cloud Computing Platforms and Services
James Hamilton posted Spot Instances, Big Clusters, & the Cloud at Work on 9/20/2011:
If you read this blog in the past, you’ll know I view cloud computing as a game changer (Private Clouds are not the Future) and spot instances as a particularly powerful innovation within cloud computing. Over the years, I’ve enumerated many of the advantages of cloud computing over private infrastructure deployments. A particularly powerful cloud computing advantage is driven by noting that when combining a large number of non-correlated workloads, the overall infrastructure utilization is far higher for most workload combinations. This is partly because the reserve capacity to ensure that all workloads are able to support peak workload demands is a tiny fraction of what is required to provide reserve surge capacity for each job individually.
This factor alone is a huge gain but an even bigger gain can be found by noting that all workloads are cyclic and go through sinusoidal capacity peaks and troughs. Some cycles are daily, some weekly, some hourly, and some on different cycles but nearly all workloads exhibit some normal expansion and contraction over time. This capacity pumping is in addition to handling unusual surge requirements or increasing demand discussed above.
To successfully run a workload, sufficient hardware must be provisioned to support the peak capacity requirement for that workload. Cost is driven by peak requirements but monetization is driven by the average. The peak to average ratio gives a view into how efficiently the workload can be hosted. Looking at an extreme, a tax preparation service has to provision enough capacity to support their busiest day and yet, in mid-summer, most of this hardware is largely unused. Tax preparation services have a very high peak to average ratio so, necessarily, utilization in a fleet dedicated to this single workload will be very low.
By hosting many diverse workloads in a cloud, the aggregate peak to average ratio trends towards flat. The overall efficiency to host the aggregate workload will be far higher than any individual workloads on private infrastructure. In effect, the workload capacity peak to trough differences get smaller as the number of combined diverse workloads goes up. Since costs tracks the provisioned capacity required at peak but monetization tracks the capacity actually being used, flattening this out can dramatically improve costs by increasing infrastructure utilization.
This is one of the most important advantages of cloud computing. But, it’s still not as much as can be done. Here’s the problem. Even with very large populations of diverse workloads, there is still some capacity that is only rarely used at peak. And, even in the limit with an infinitely large aggregated workload where the peak to average ratio gets very near flat, there still must be some reserved capacity such that surprise, unexpected capacity increases, new customers, or new applications can be satisfied. We can minimize the pool of rarely used hardware but we can’t eliminate it.
What we have here is yet another cloud computing opportunity. Why not sell the unused reserve capacity on the spot market? This is exactly what AWS is doing with Amazon EC2 Spot Instances. From the Spot Instance detail page:
Spot Instances enable you to bid for unused Amazon EC2 capacity. Instances are charged the Spot Price set by Amazon EC2, which fluctuates periodically depending on the supply of and demand for Spot Instance capacity. To use Spot Instances, you place a Spot Instance request, specifying the instance type, the Availability Zone desired, the number of Spot Instances you want to run, and the maximum price you are willing to pay per instance hour. To determine how that maximum price compares to past Spot Prices, the Spot Price history for the past 90 days is available via the Amazon EC2 API and the AWS Management Console. If your maximum price bid exceeds the current Spot Price, your request is fulfilled and your instances will run until either you choose to terminate them or the Spot Price increases above your maximum price (whichever is sooner).
It’s important to note two points:
1. You will often pay less per hour than your maximum bid price. The Spot Price is adjusted periodically as requests come in and available supply changes. Everyone pays that same Spot Price for that period regardless of whether their maximum bid price was higher. You will never pay more than your maximum bid price per hour.
2. If you’re running Spot Instances and your maximum price no longer exceeds the current Spot Price, your instances will be terminated. This means that you will want to make sure that your workloads and applications are flexible enough to take advantage of this opportunistic capacity. It also means that if it’s important for you to run Spot Instances uninterrupted for a period of time, it’s advisable to submit a higher maximum bid price, especially since you often won’t pay that maximum bid price.
Spot Instances perform exactly like other Amazon EC2 instances while running, and like other Amazon EC2 instances, Spot Instances can be terminated when you no longer need them. If you terminate your instance, you will pay for any partial hour (as you do for On-Demand or Reserved Instances). However, if the Spot Price goes above your maximum price and your instance is terminated by Amazon EC2, you will not be charged for any partial hour of usage.
Spot instances effectively harvest unused infrastructure capacity. The servers, data center space, and network capacity are all sunk costs. Any workload worth more than the marginal costs of power is profitable to run. This is a great deal for customers in because it allows non-urgent workloads to be run at very low cost. Spot Instances are also a great for the cloud provider because it further drives up utilization with the only additional cost being the cost of power consumed by the spot workloads. From Overall Data Center Costs, you’ll recall that the cost of power is a small portion of overall infrastructure expense.
I’m particularly excited about Spot instances because, while customers get incredible value, the feature is also a profitable one to offer. Its perhaps the purest win/win in cloud computing.
Spot Instances only work in a large market with many diverse customers. This is a lesson learned from the public financial markets. Without a broad number of buyers and sellers brought together, the market can’t operate efficiently. Spot requires a large customer base to operate effectively and, as the customer base grows, it continues to gain efficiency with increased scale.
I recently came across a blog posting that ties these ideas together: New CycleCloud HPC Cluster Is a Triple Threat: 30000 cores, $1279/Hour, & Grill monitoring GUI for Chef. What’s described in this blog posting is a mammoth computational cluster assembled in the AWS cloud. The speeds and feeds for the clusters:
- C1.xlarge instances: 3,809
- Cores: 30,472
- Memory: 36.7 TB
The workload was molecular modeling. The cluster was managed using the Condor job scheduler and deployment was automated using the increasingly popular Opscode Chef. Monitoring was done using a packaged that CycleComputing wrote that provides a nice graphical interface to this large cluster: Grill for CycleServer (very nice).
The cluster came to life without capital planning, there was no wait for hardware arrival, no datacenter space needed to be built or bought, the cluster ran 154,116 condor jobs with 95,078 compute hours of work and, when the project was done, was torn down without a trace.
What is truly eye opening for me in this example is that it’s a 30,000 core cluster for $1,279/hour. The cloud and Spot instances changes everything. $1,279/hour for 30k cores. Amazing.
Thanks to Deepak Singh for sending the CycleServer example my way.


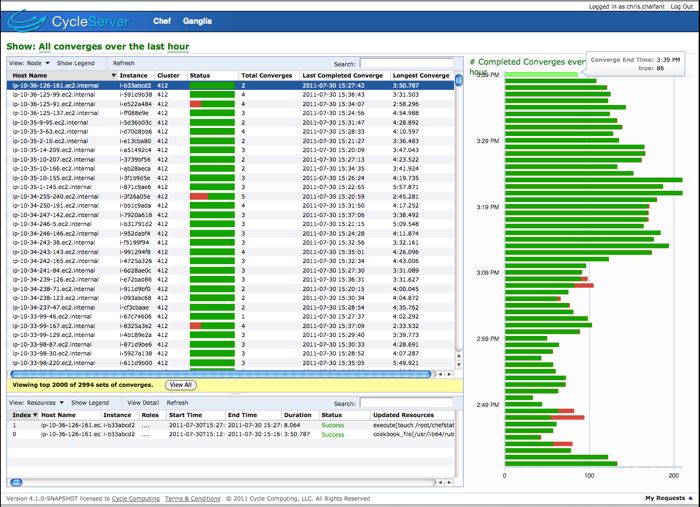
<Return to section navigation list>


0 comments:
Post a Comment